Setting up your Blog/Site
Your Website
Step 1. Choose your Identity
Choose a good name for your site. Once you decide on the name, make it your Site Title by going to My Site → Settings. You can add a Tagline too!
By signing up, you already have a site address like yourgroovysite.wordpress.com but you can register your very own domain like yourgroovydomain.com. Your domain is free for the first year with any WordPress.com plan!
Step 2. Design Your Homepage
You can use one of Wordpress pre-built page layouts to create a homepage. Load any designs and then change, add, or remove any elements to make it your own.
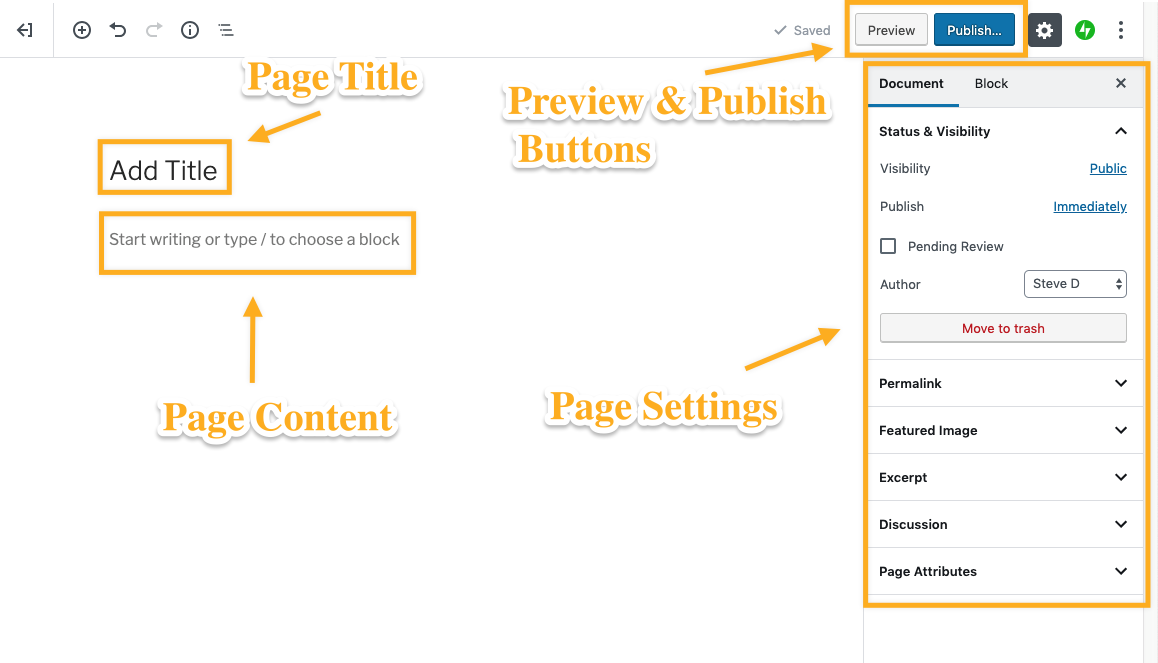
On the right side of the editor are the page settings. From here, you can see the status of the page, add categories and tags to posts, set a featured image, and much more.
The Block Editor
You will create your pages and posts using the Block editor — think of it as the building blocks of your website! You can add content to the page by inserting various blocks. You can do so by clicking the block inserter + icon which is found in various places within the editor. There are all sorts of blocks that you can add – paragraphs, images, galleries, columns and tables – the list is quite exhaustive!
Some common blocks you might want to make use of are:
- Paragraph block: the default block that you can use to add regular text to a post or page.
- Image block: for adding individual images inside the post or page.
- Cover block: for adding text on top of an image.
- Columns block: this lets you place blocks side by side easily.
- Heading block: adds header text inside the post or page.
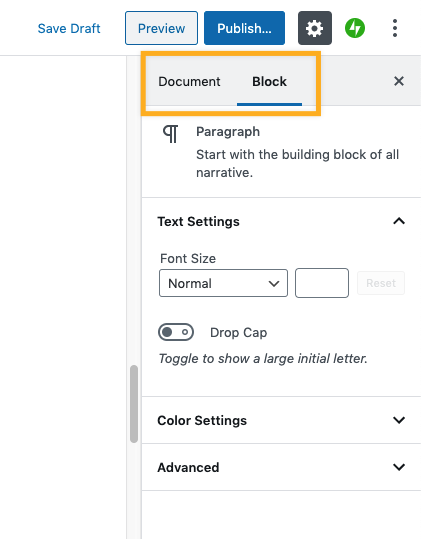
Whenever you add a block and select it, you’ll notice there are more block settings on the right side of the editor. Each block has its own settings you can adjust. Switch to the “Document” tab at the top to go back to overall page settings.
Step 3. Create More Pages
Add more pages, like an About page and a Contact page. Go to My Site → Pages → Add New Page to get started.
Content – the content on your site is made up of pages, posts, and media. You can add or edit pages and posts by going to My Sites → Posts/Pages. You will make changes using the Block editor.
Step 4. Set Up Your Menu
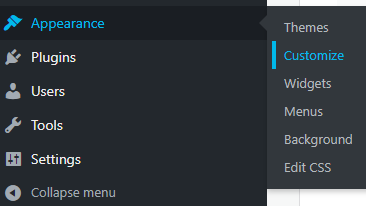
The menu is the list of links you see at the top of a website that readers can use to find their way around your site. You can now add the pages you created in Steps Two and Three. Get started at My Site → Appearance → Customize → Menus.
Customization– Site-wide changes, such as editing menus, adjusting colors, adding widgets, and more, are done from theCustomizer. You can get to the Customizer by going toMy Site(s) → Appearance → Customize.
Step 5. Add Your Social Media Presence
If you have a social media presence, your website is the perfect place to promote it. You can add social media media icons to your site’s menu using the Social Links menu or to the content of any page using the Social Links block. All major social media services are supported!
Bonus
Here are some optional steps you may wish to do next:
Your Blog
Step 1. Choose your Identity
Step 2: Write Your First Post
Go to My Site → Posts and click Add New Post to start drafting your first introduction to the world
Step 3: Display Your Posts
The Blog Posts block will display your posts on various pages of your site.
Step 4: Create a Navigation Menu
Get started at My Site → Appearance → Customize → Menus.
Step 5: Get Your First Followers
Add a prominent follow button using either the Subscription Form block (to any page or post) or the Follow Blog widget (to your sidebar or footer). Add both if you like! Then, invite friends and family to click that follow button to be notified of your new posts. You can also connect your social networks to automatically share new posts to Facebook, Twitter, and more for extra exposure.