SPU-AOVPN
Overview
The SPU-AOVPN, powered by Microsoft's Always On VPN technology. SPU-AOVPN replaces the legacy SPU VPN, and allows you to connect to campus resources while working remotely.
Conflict with VPN-PRIVDATA or VPN-CIS
If you have the VPN-PRIVDATA connection (or VPN-CIS), it is possible to be connected to both VPN-PRIVDATA and SPU-AOVPN simultaneously, however, SPU-AOVPN will effectively take precedence, thereby blocking your access to resources that require VPN-PRIVDATA. If you need to connect to VPN-PRIVDATA, you will need to disconnect from SPU-AOVPN and set it to not Connect Automatically.
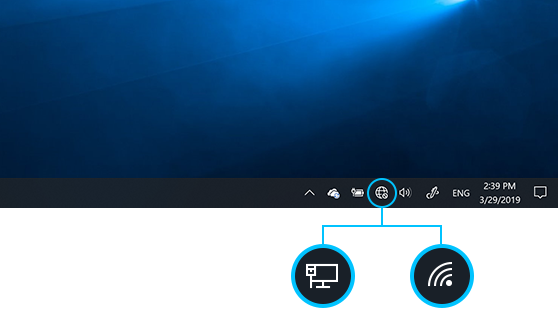
Step 1 Track to the bottom Right hand corner of the screen. You are looking for the Internet Access symbol, to the right are all possible ways the Internet Access symbol might look like. |
|
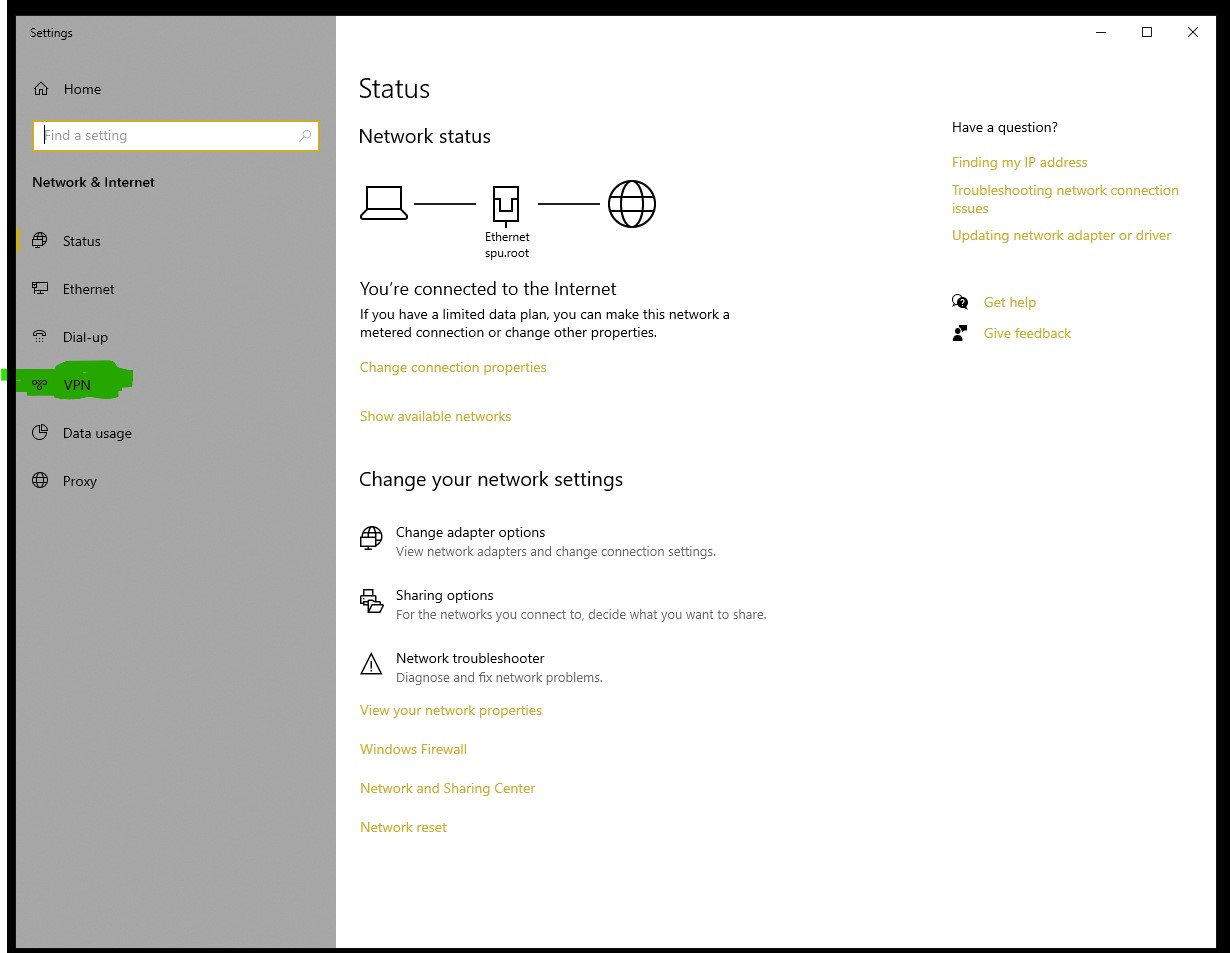
Step 2 Right Click on the Internet Access symbol and select Open Network & Internet settings |
|
Step 3 A Windows Setting box will open, track to VPN which is highlighted in Green |
|
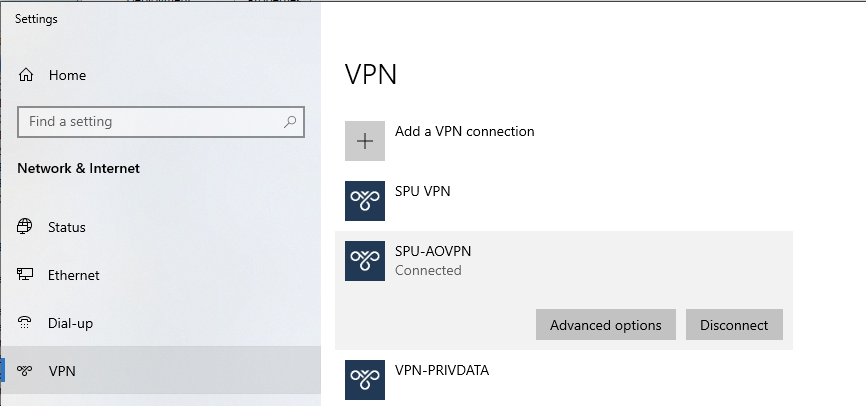
Step 4 Click on SPU-AOVPN. It will become highlighted with a dark gray box. Click Disconnect. |
|
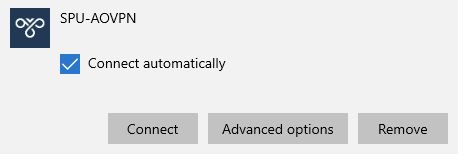
Step 5 The dark grey box will briefly show a checkbox next to the words "Connect automatically." It will automatically reconnect until you uncheck the box. Repeat clicking "Disconnect" until you are able to successfully uncheck "Connect automatically." Once that is unchecked, you should be able to Connect or Disconnect to the SPU-AOVPN at your leisure. |
|