Hosting a Webinar with Microsoft Teams
Overview
Following the steps below will give you the minimum information about how to setup and configure a webinar using Microsoft Teams.
For a more in depth look you can go through this Getting Started Guide by Microsoft. There are videos, screenshots, and tons of helpful details.
Setup Steps
As the person creating the Live Event, you are assigned the roles of Organizer and Producer.
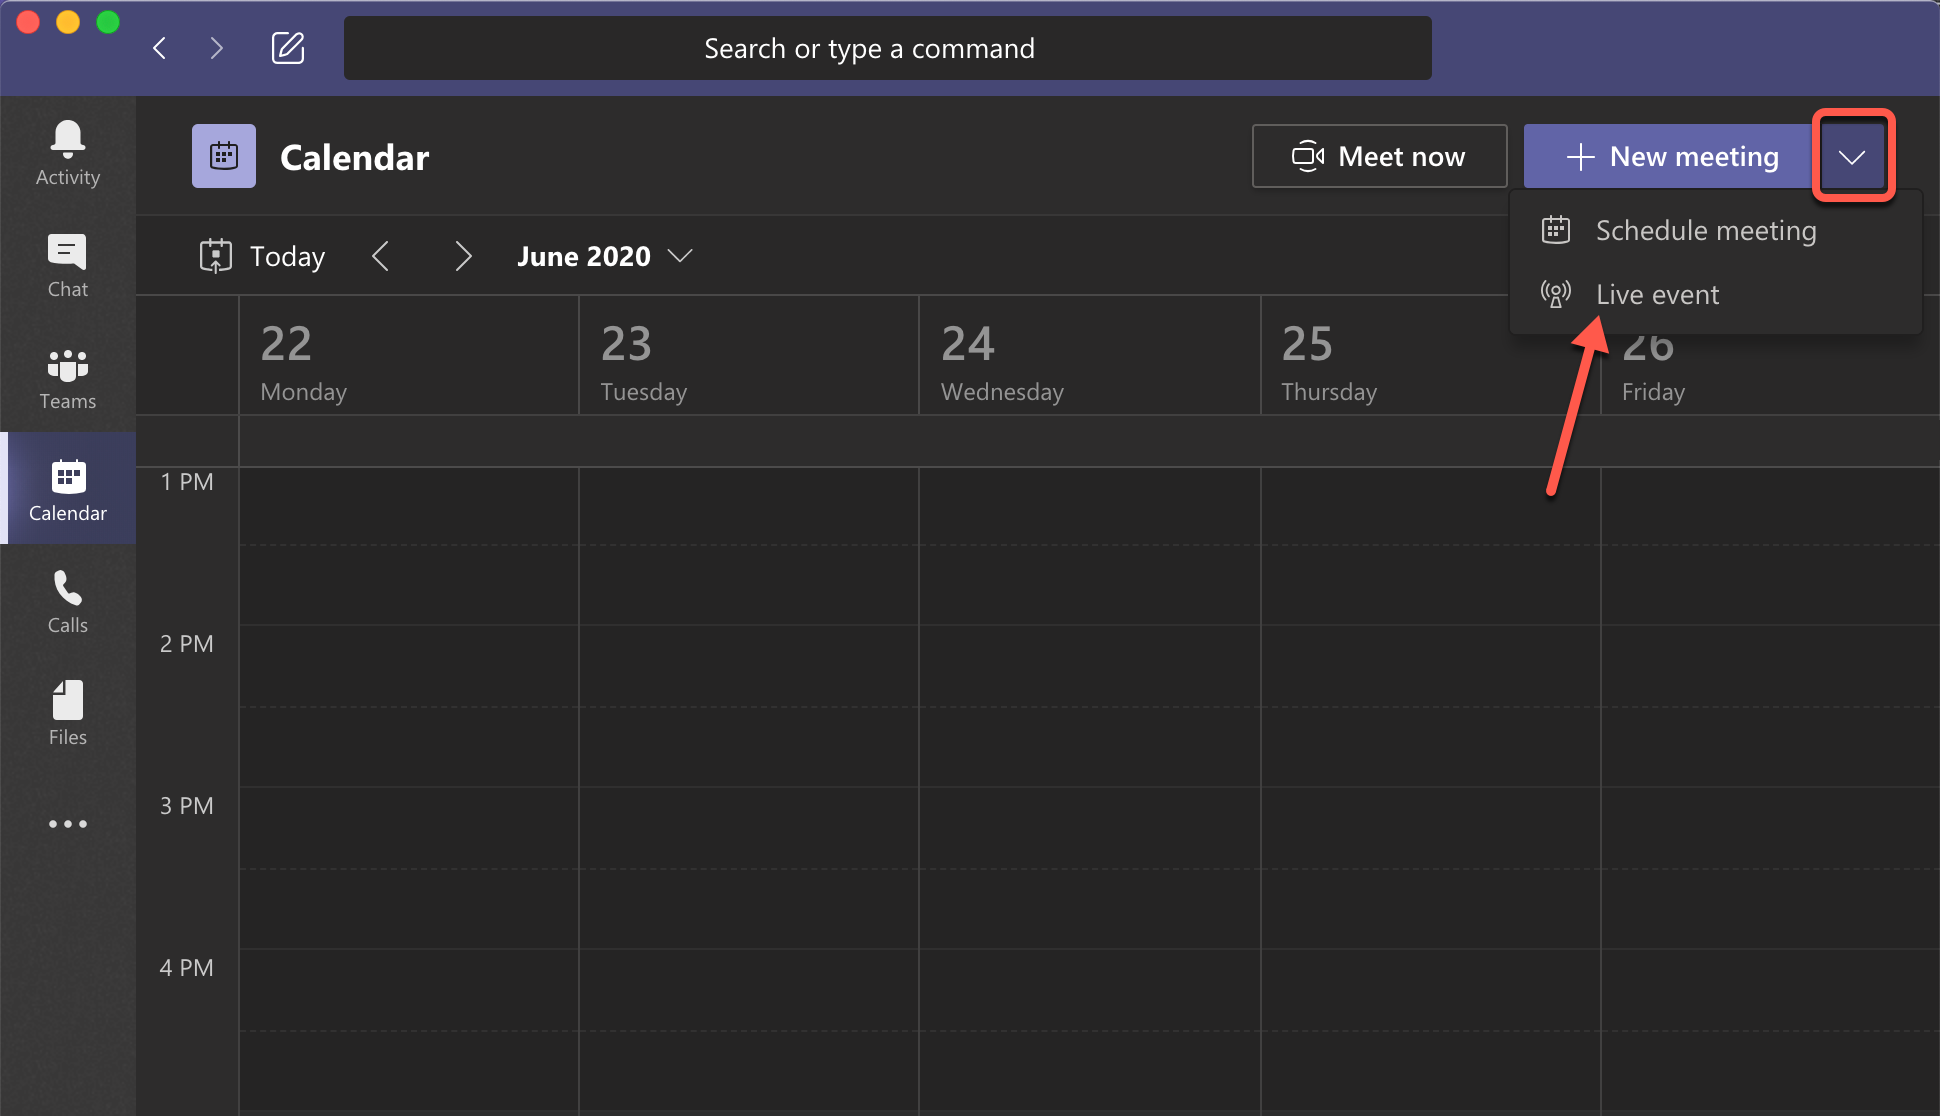
- In the left column, click the calendar tab

- In the top right, click the down down-facing chevron icon, then click Live Event
- In the New Live Event window enter the following event details:
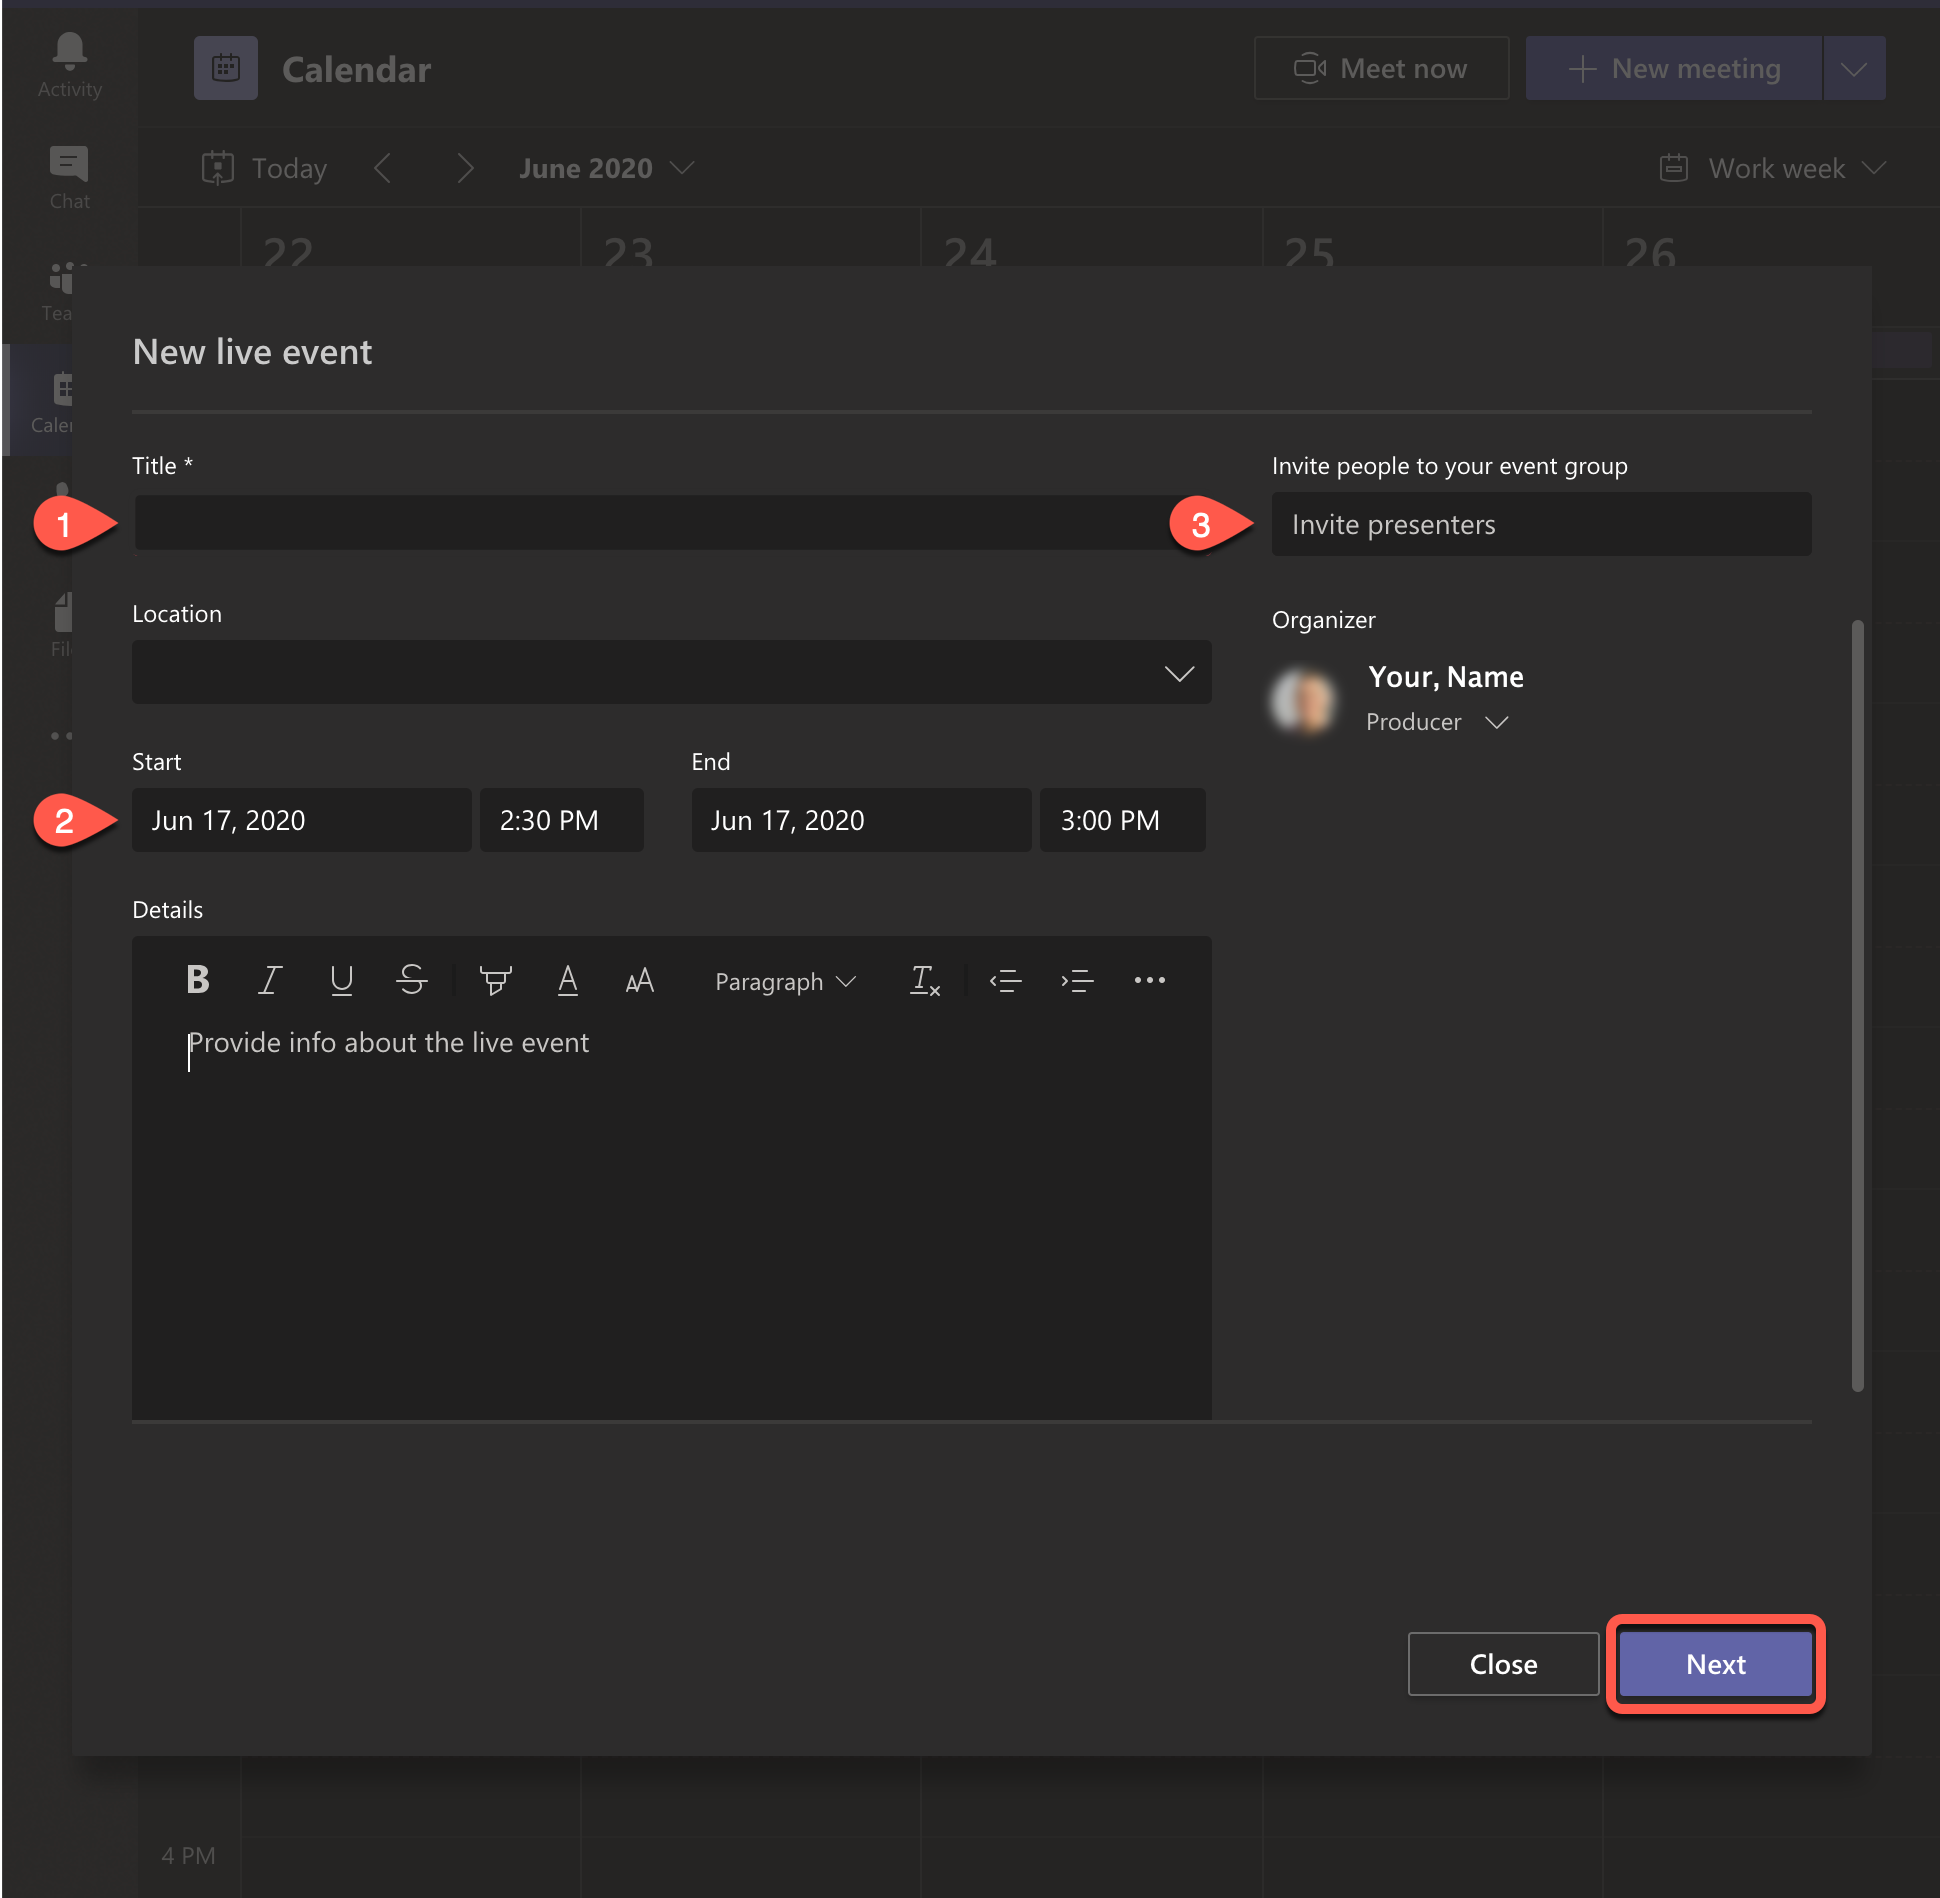
- the name
- the date and time
- invite presenters and support staff who will be joining the event
- do not include audience members here, that is addressed later
- this field accesses the SPU directory for people within the university
- for people outside the university, use their email address
- In the lower right, click Next
- Select the permissions for who can watch your live event. Read each set of permissions before making a selection.
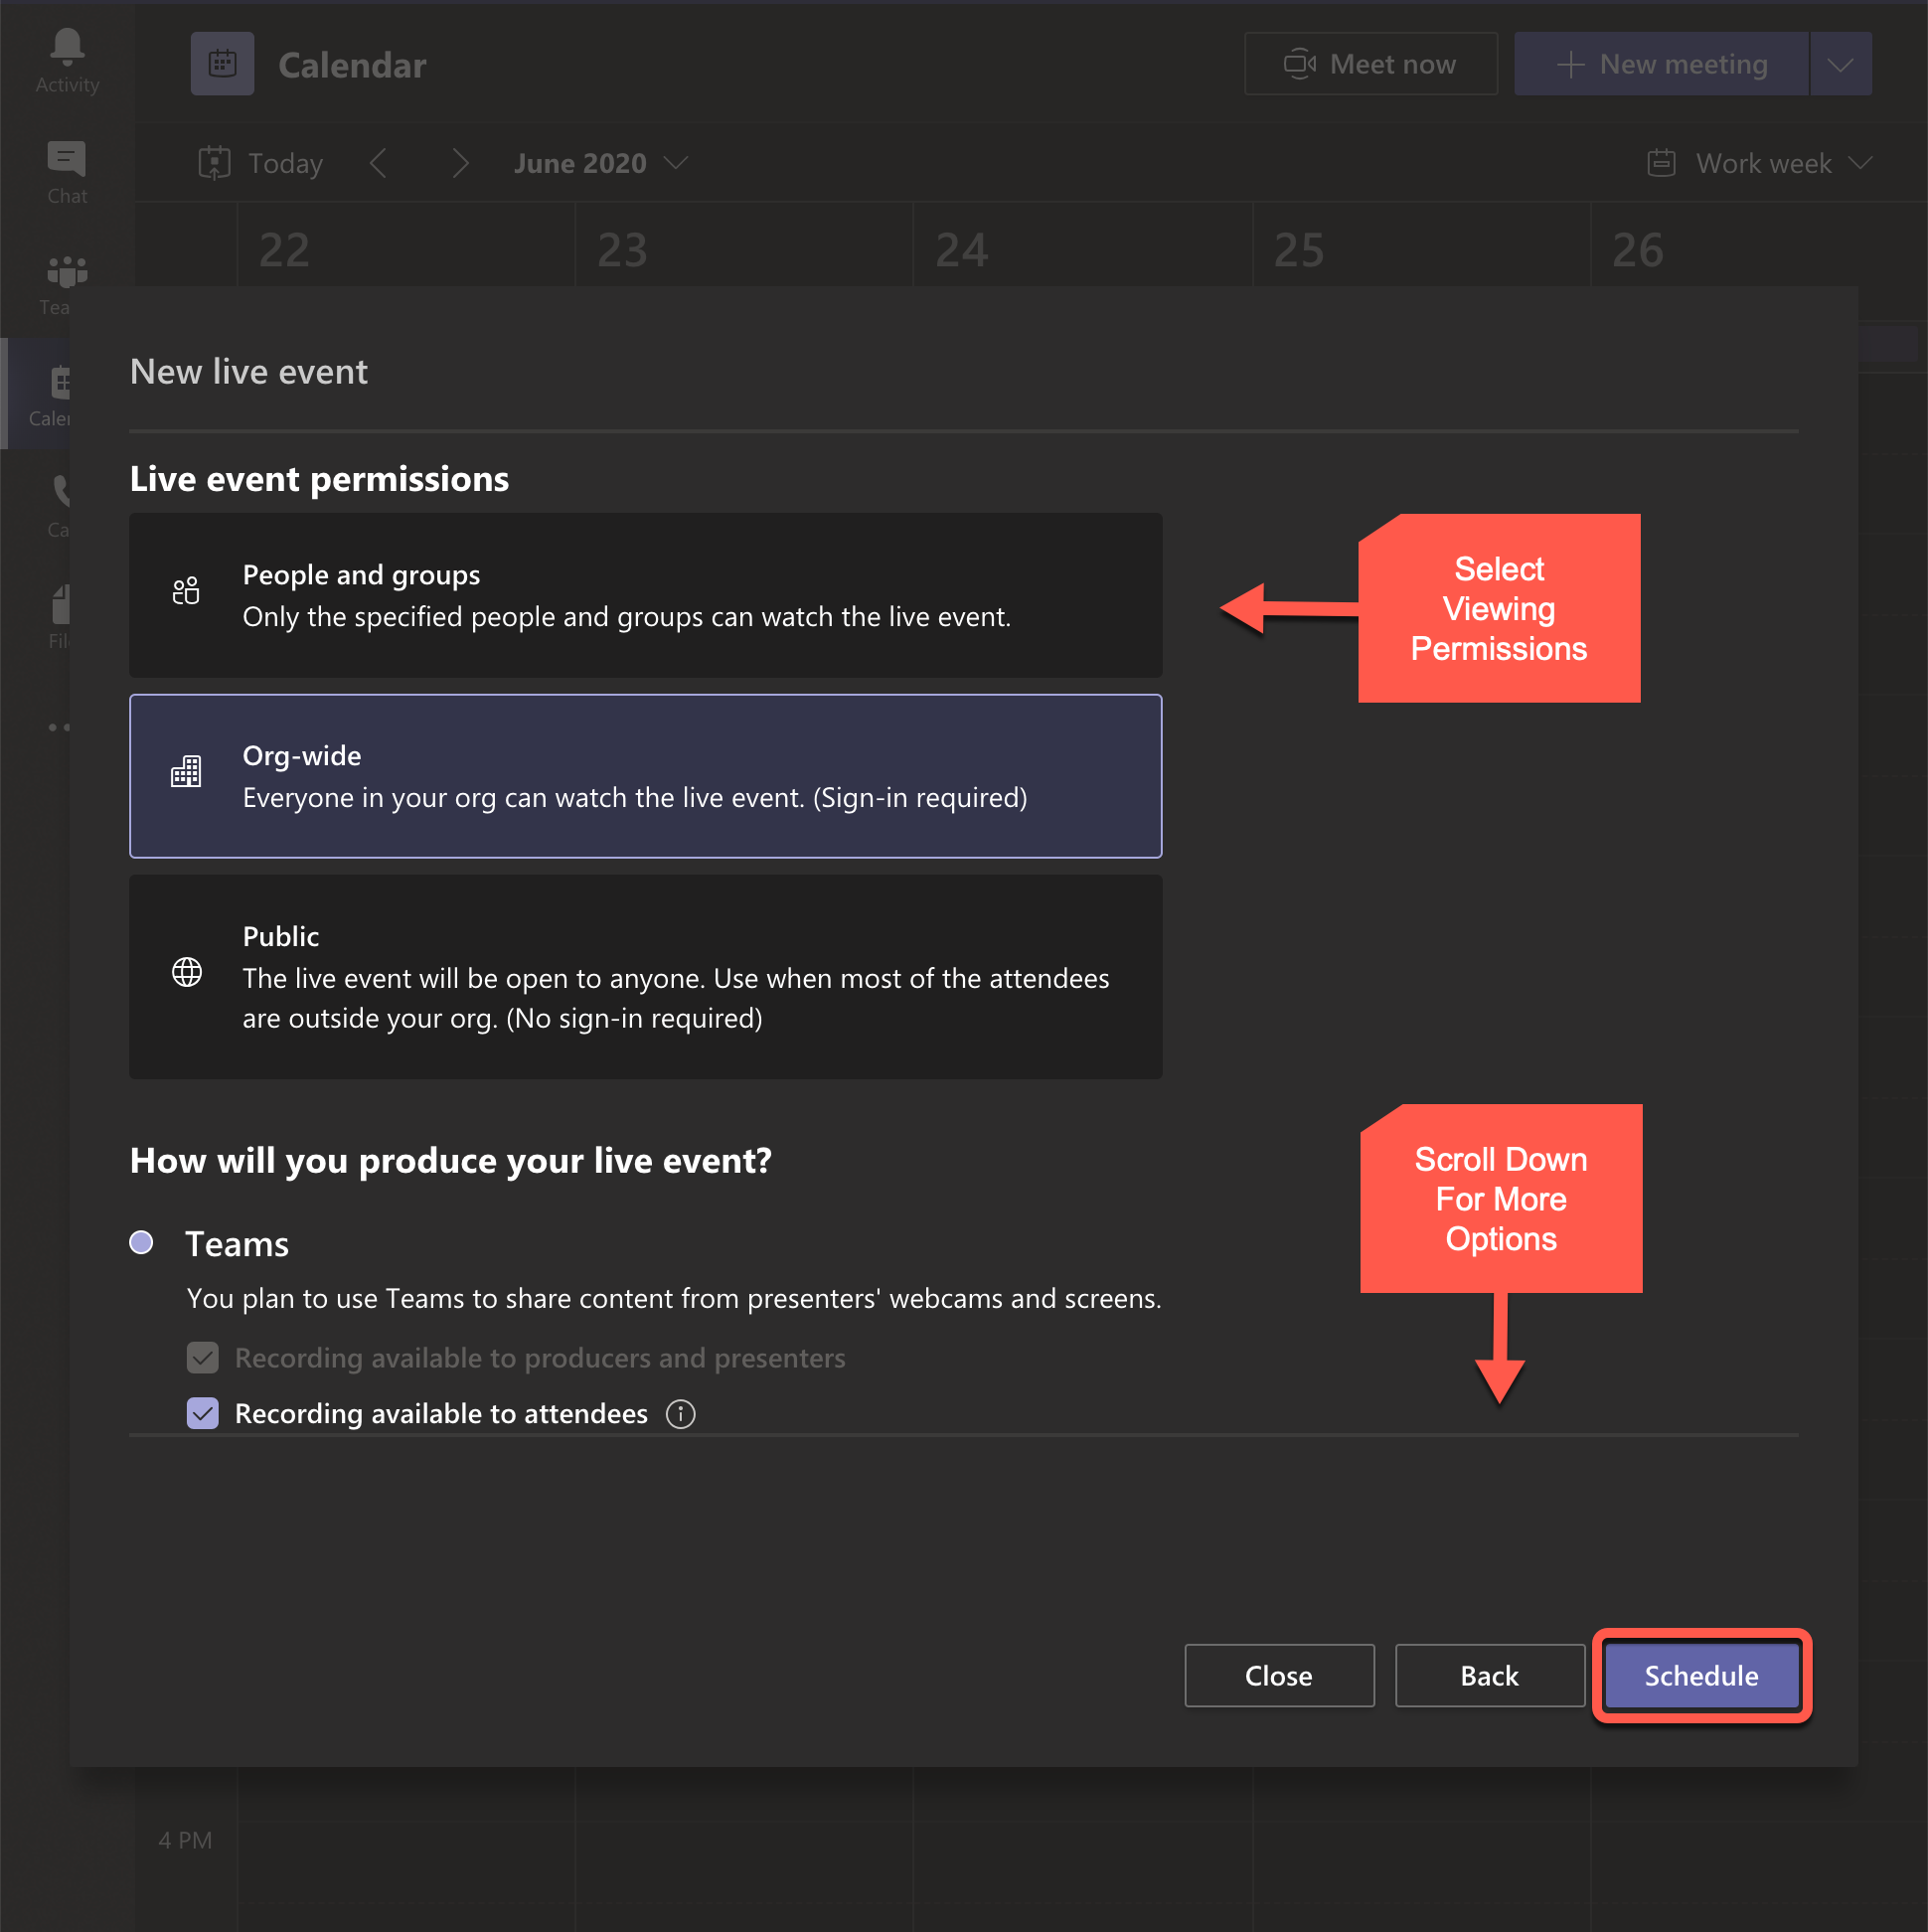
- In the lower right, click Schedule
Joining and Going Live
As the organizer, you will need to join the Live Event. Presenters, emcees, and support staff will join the invite by the invitation you sent in Step 3 above.
Audience members will view the event by the link you send them in Step 5 above.
- Copy the link to your event. Send this link to your audience members.
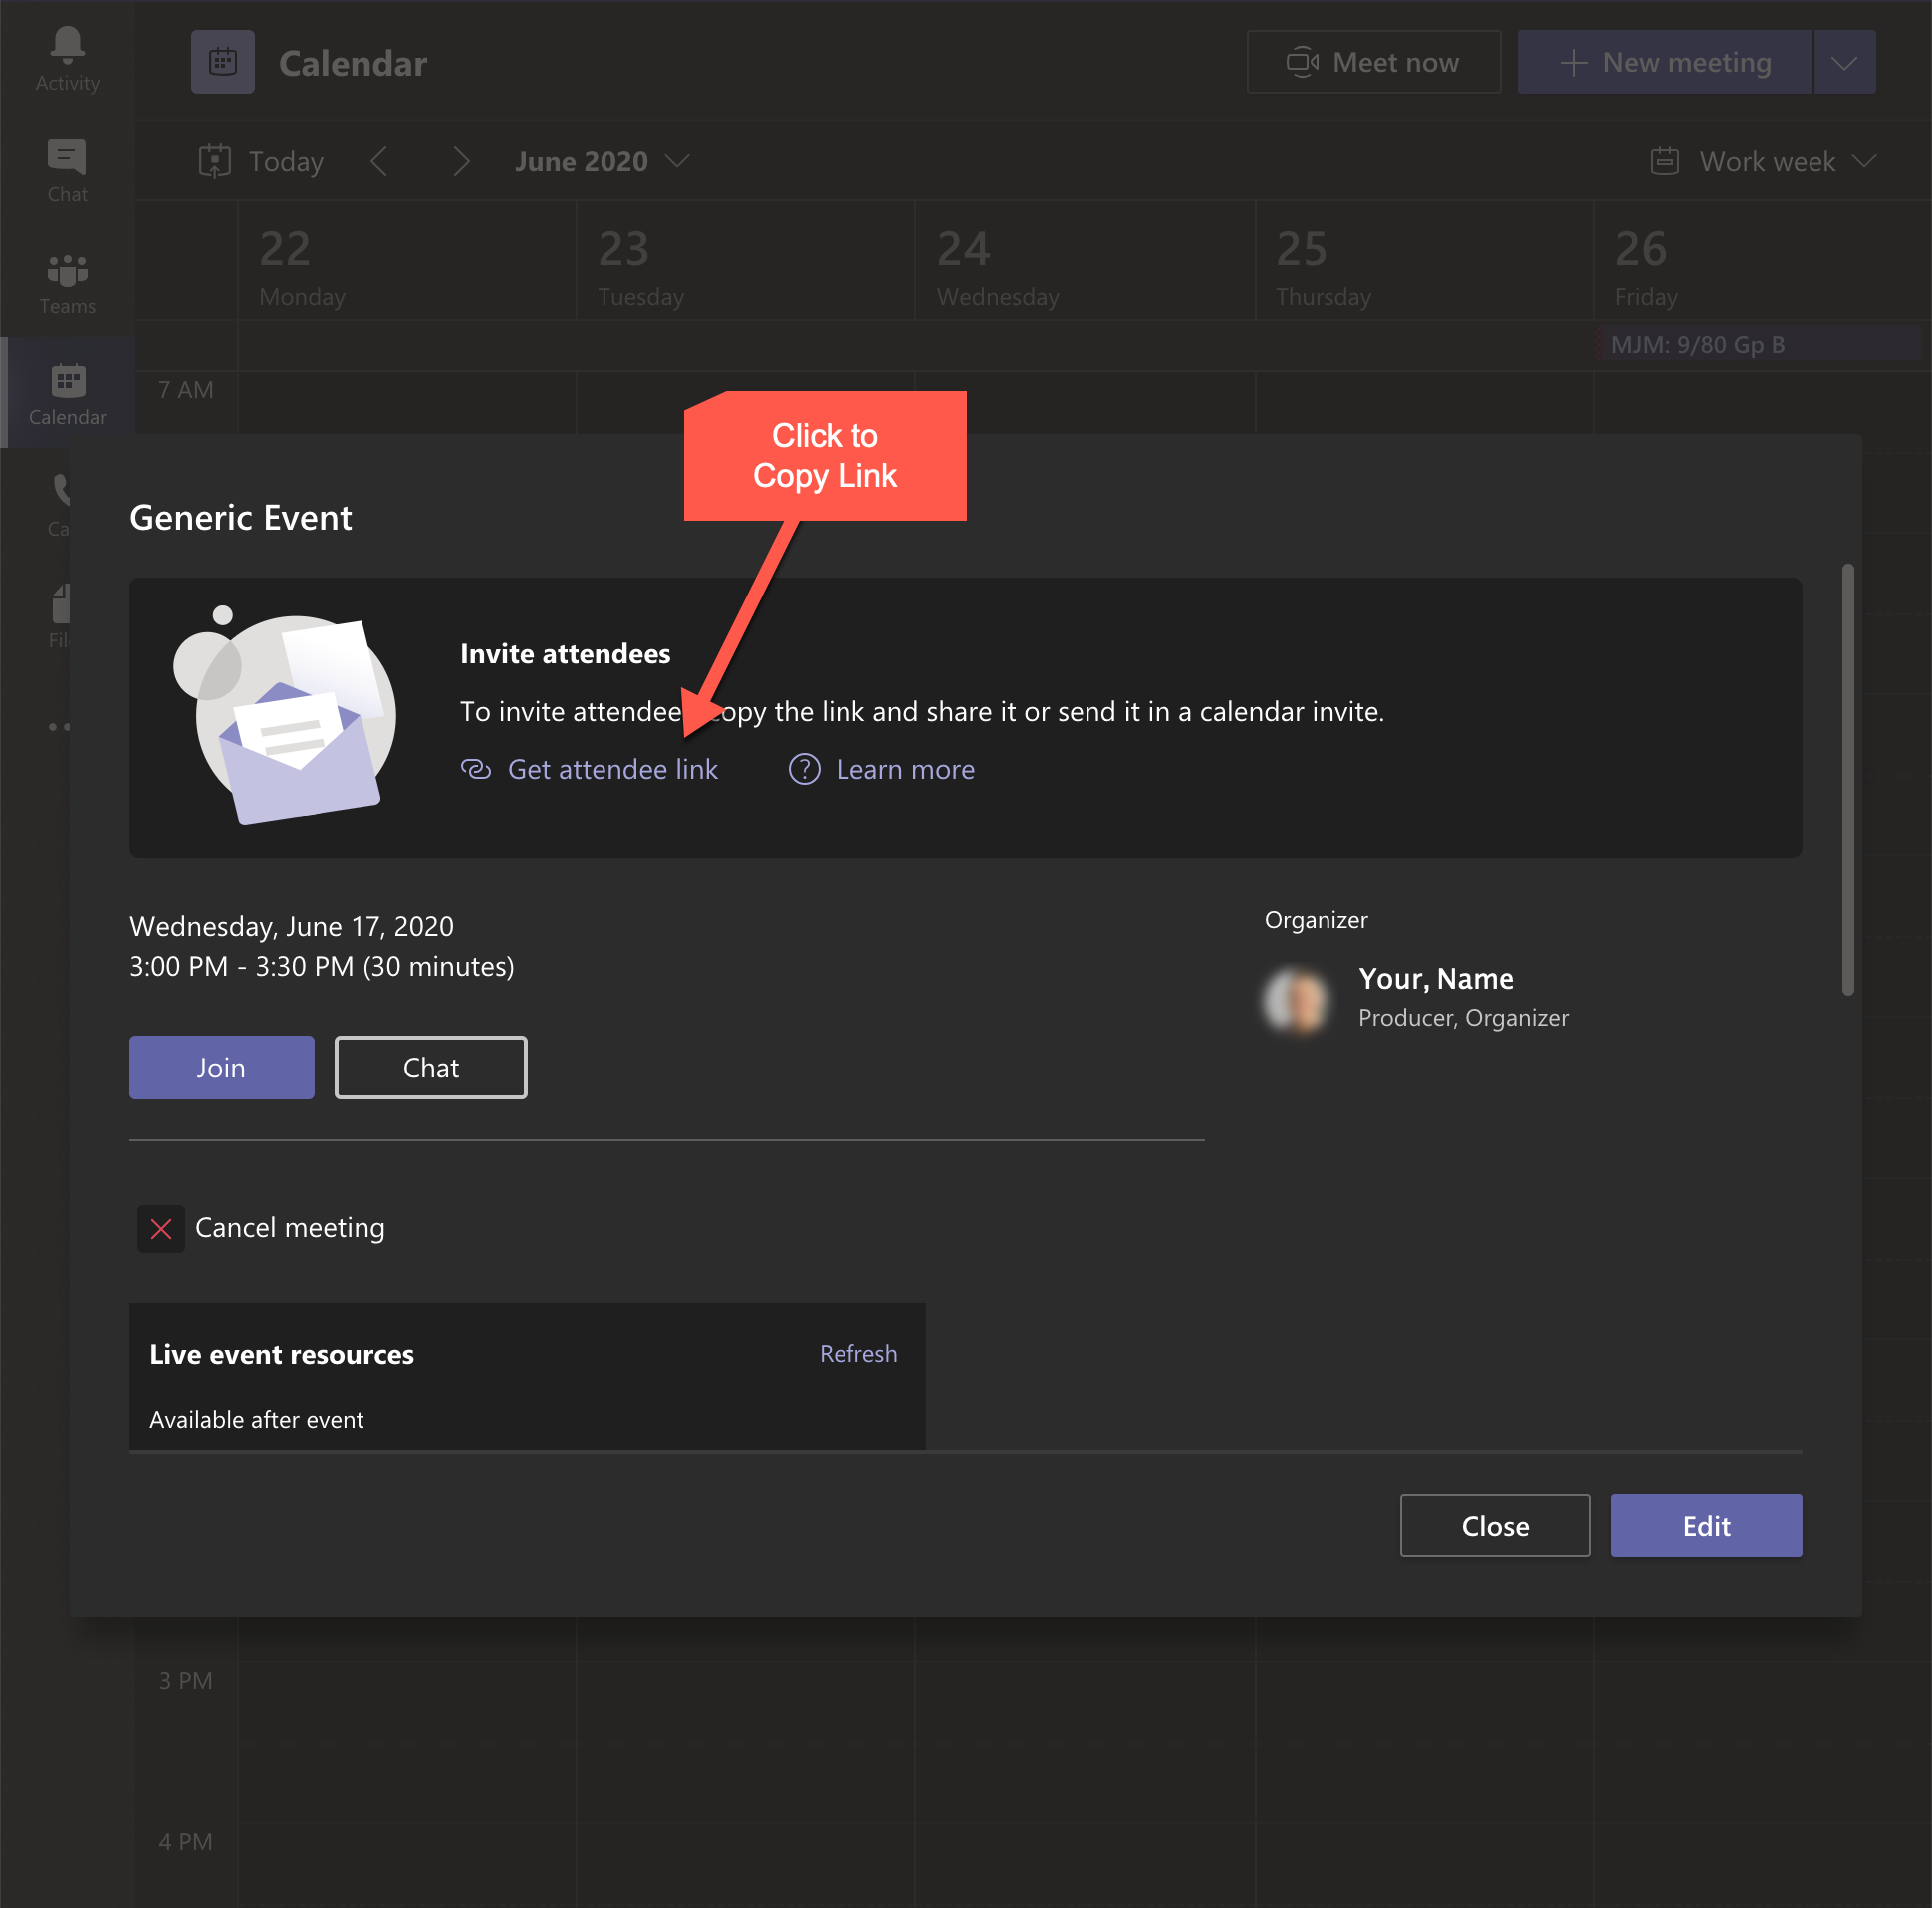
- audience members will have the choice of watching the event on the web or in the Teams app
- whether an audience member is required to sign-in is determined by the permissions selected in Step 5 above
- As the organizer, you will need to join the Live Event. If the event is starting soon, click the Join button now. Otherwise click Close.
- To join the event at a later date, In the left column, click the calendar tab, then click Join now
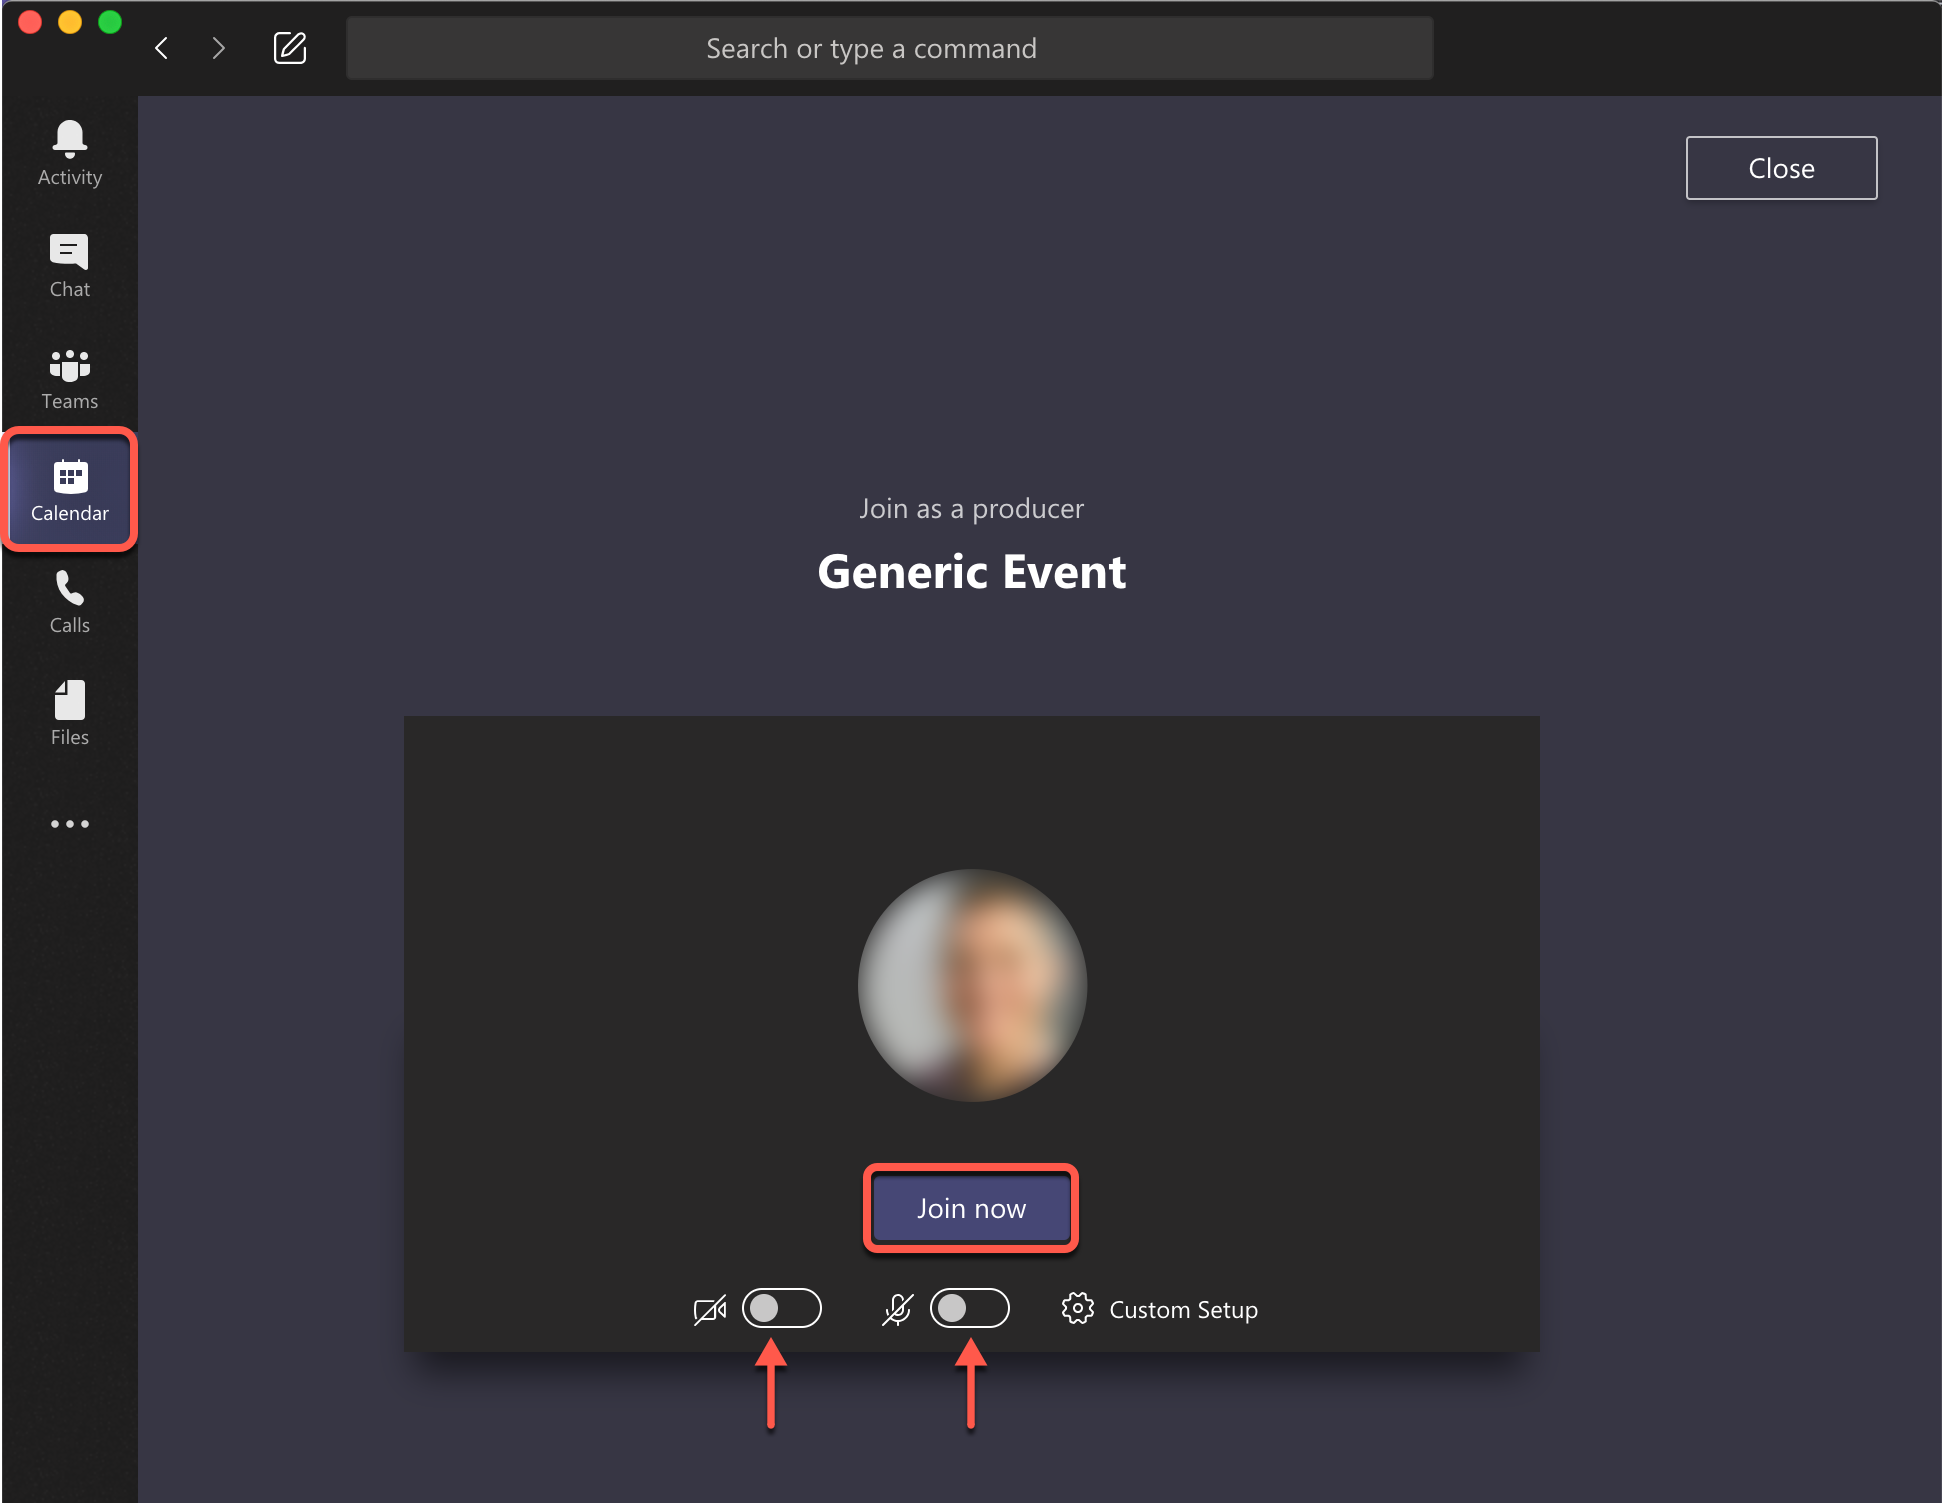
- Decide whether to join with or without your mic and video enabled
- Decide whether to join with or without your mic and video enabled
- After joining, the event is in the Pre-Live stage. During this time you can monitor when presenters joins, use Chat, and organize the content you plan to share
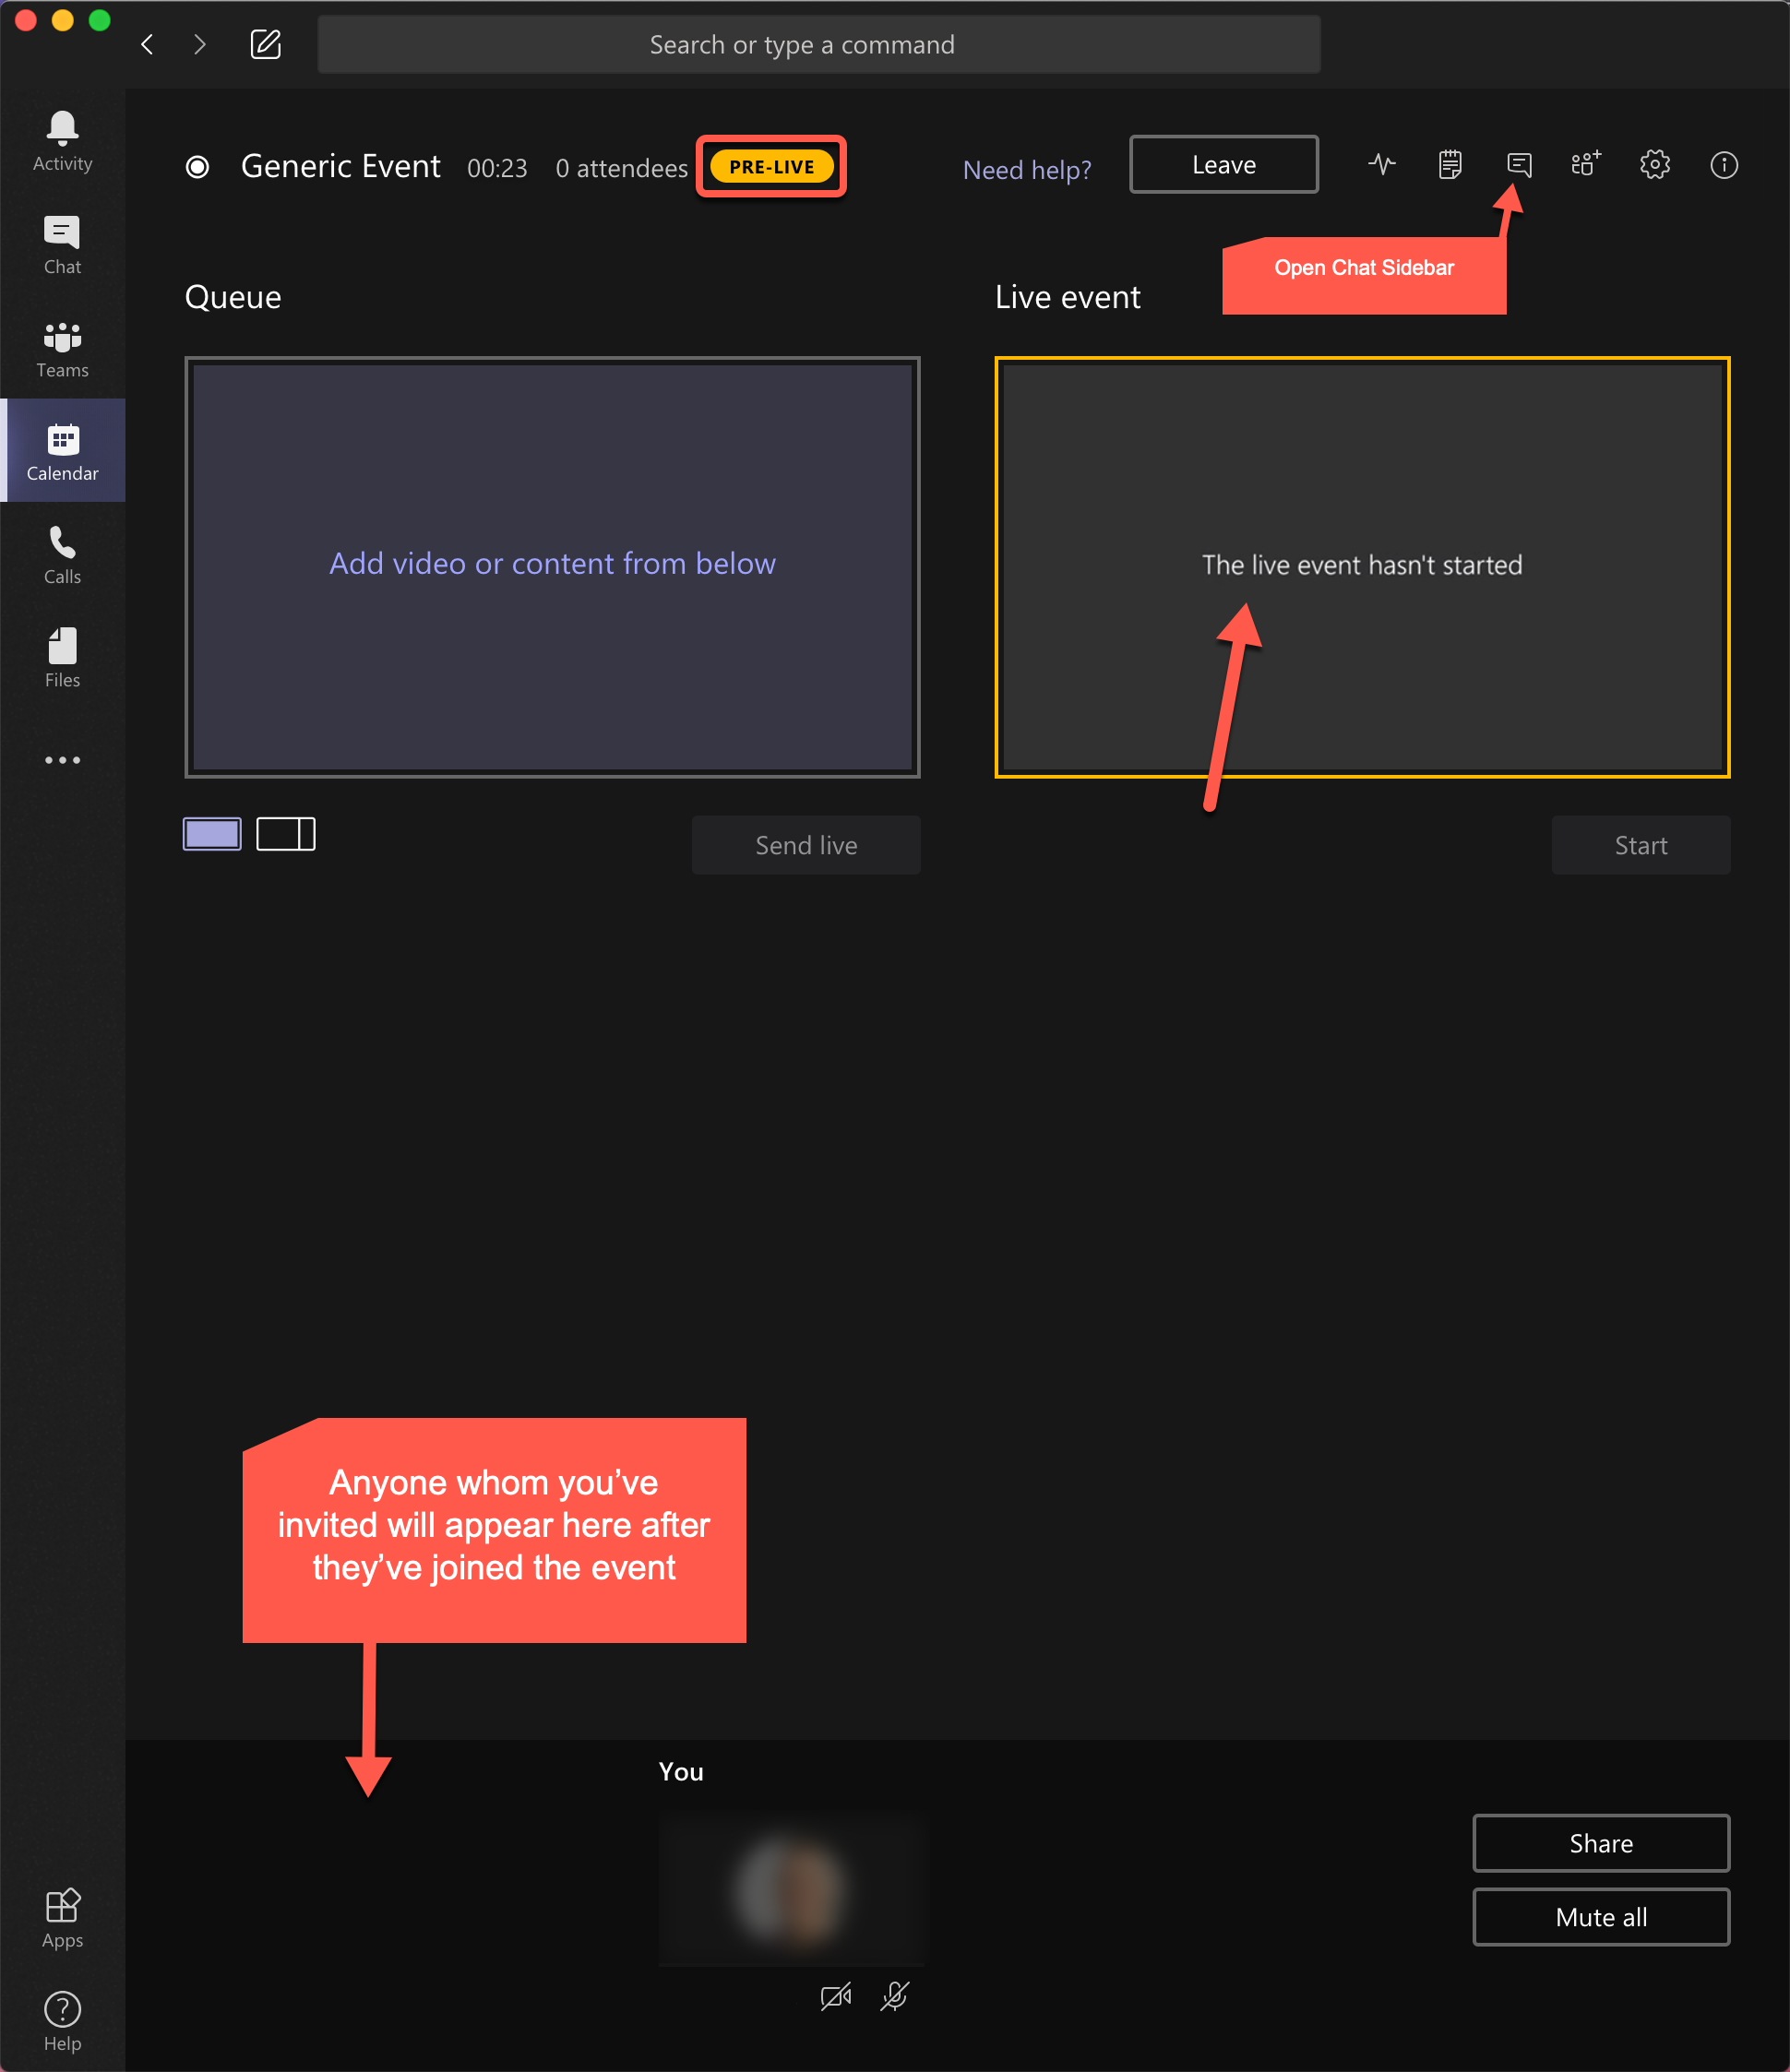
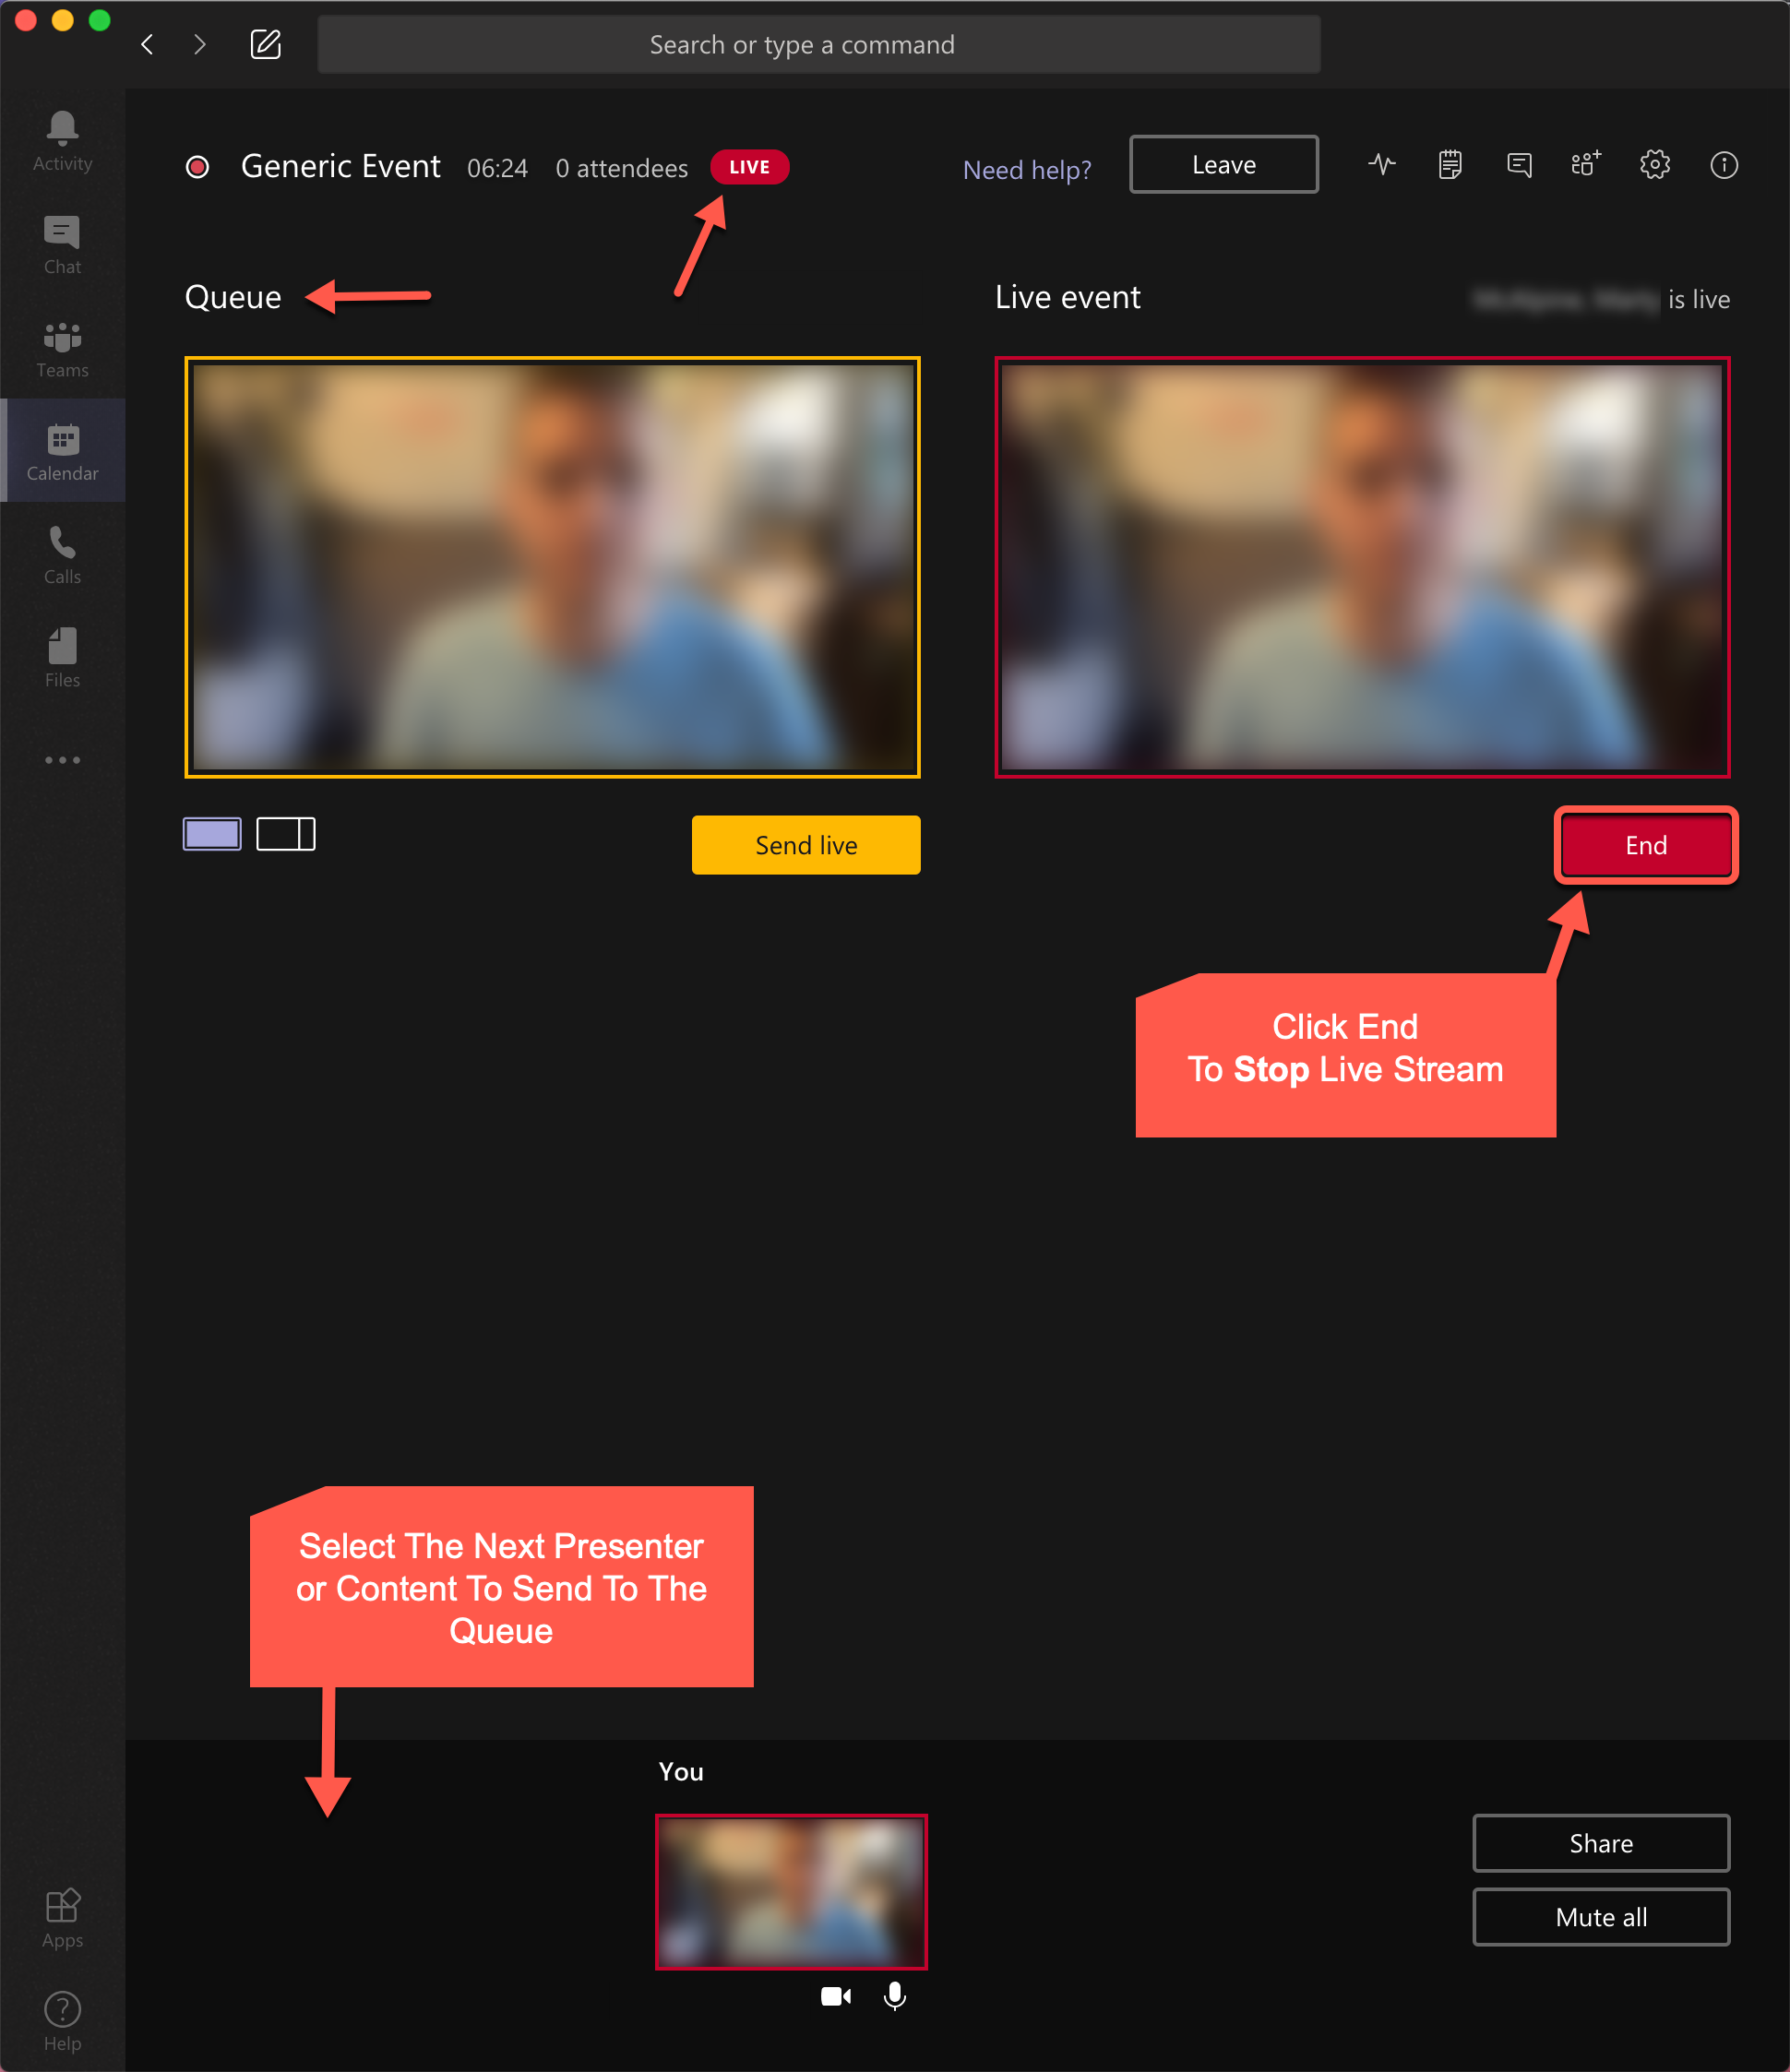
- When you select a presenter or a piece of content (ex. PowerPoint) from the bottom tray, it will go to the Queue window on the left.
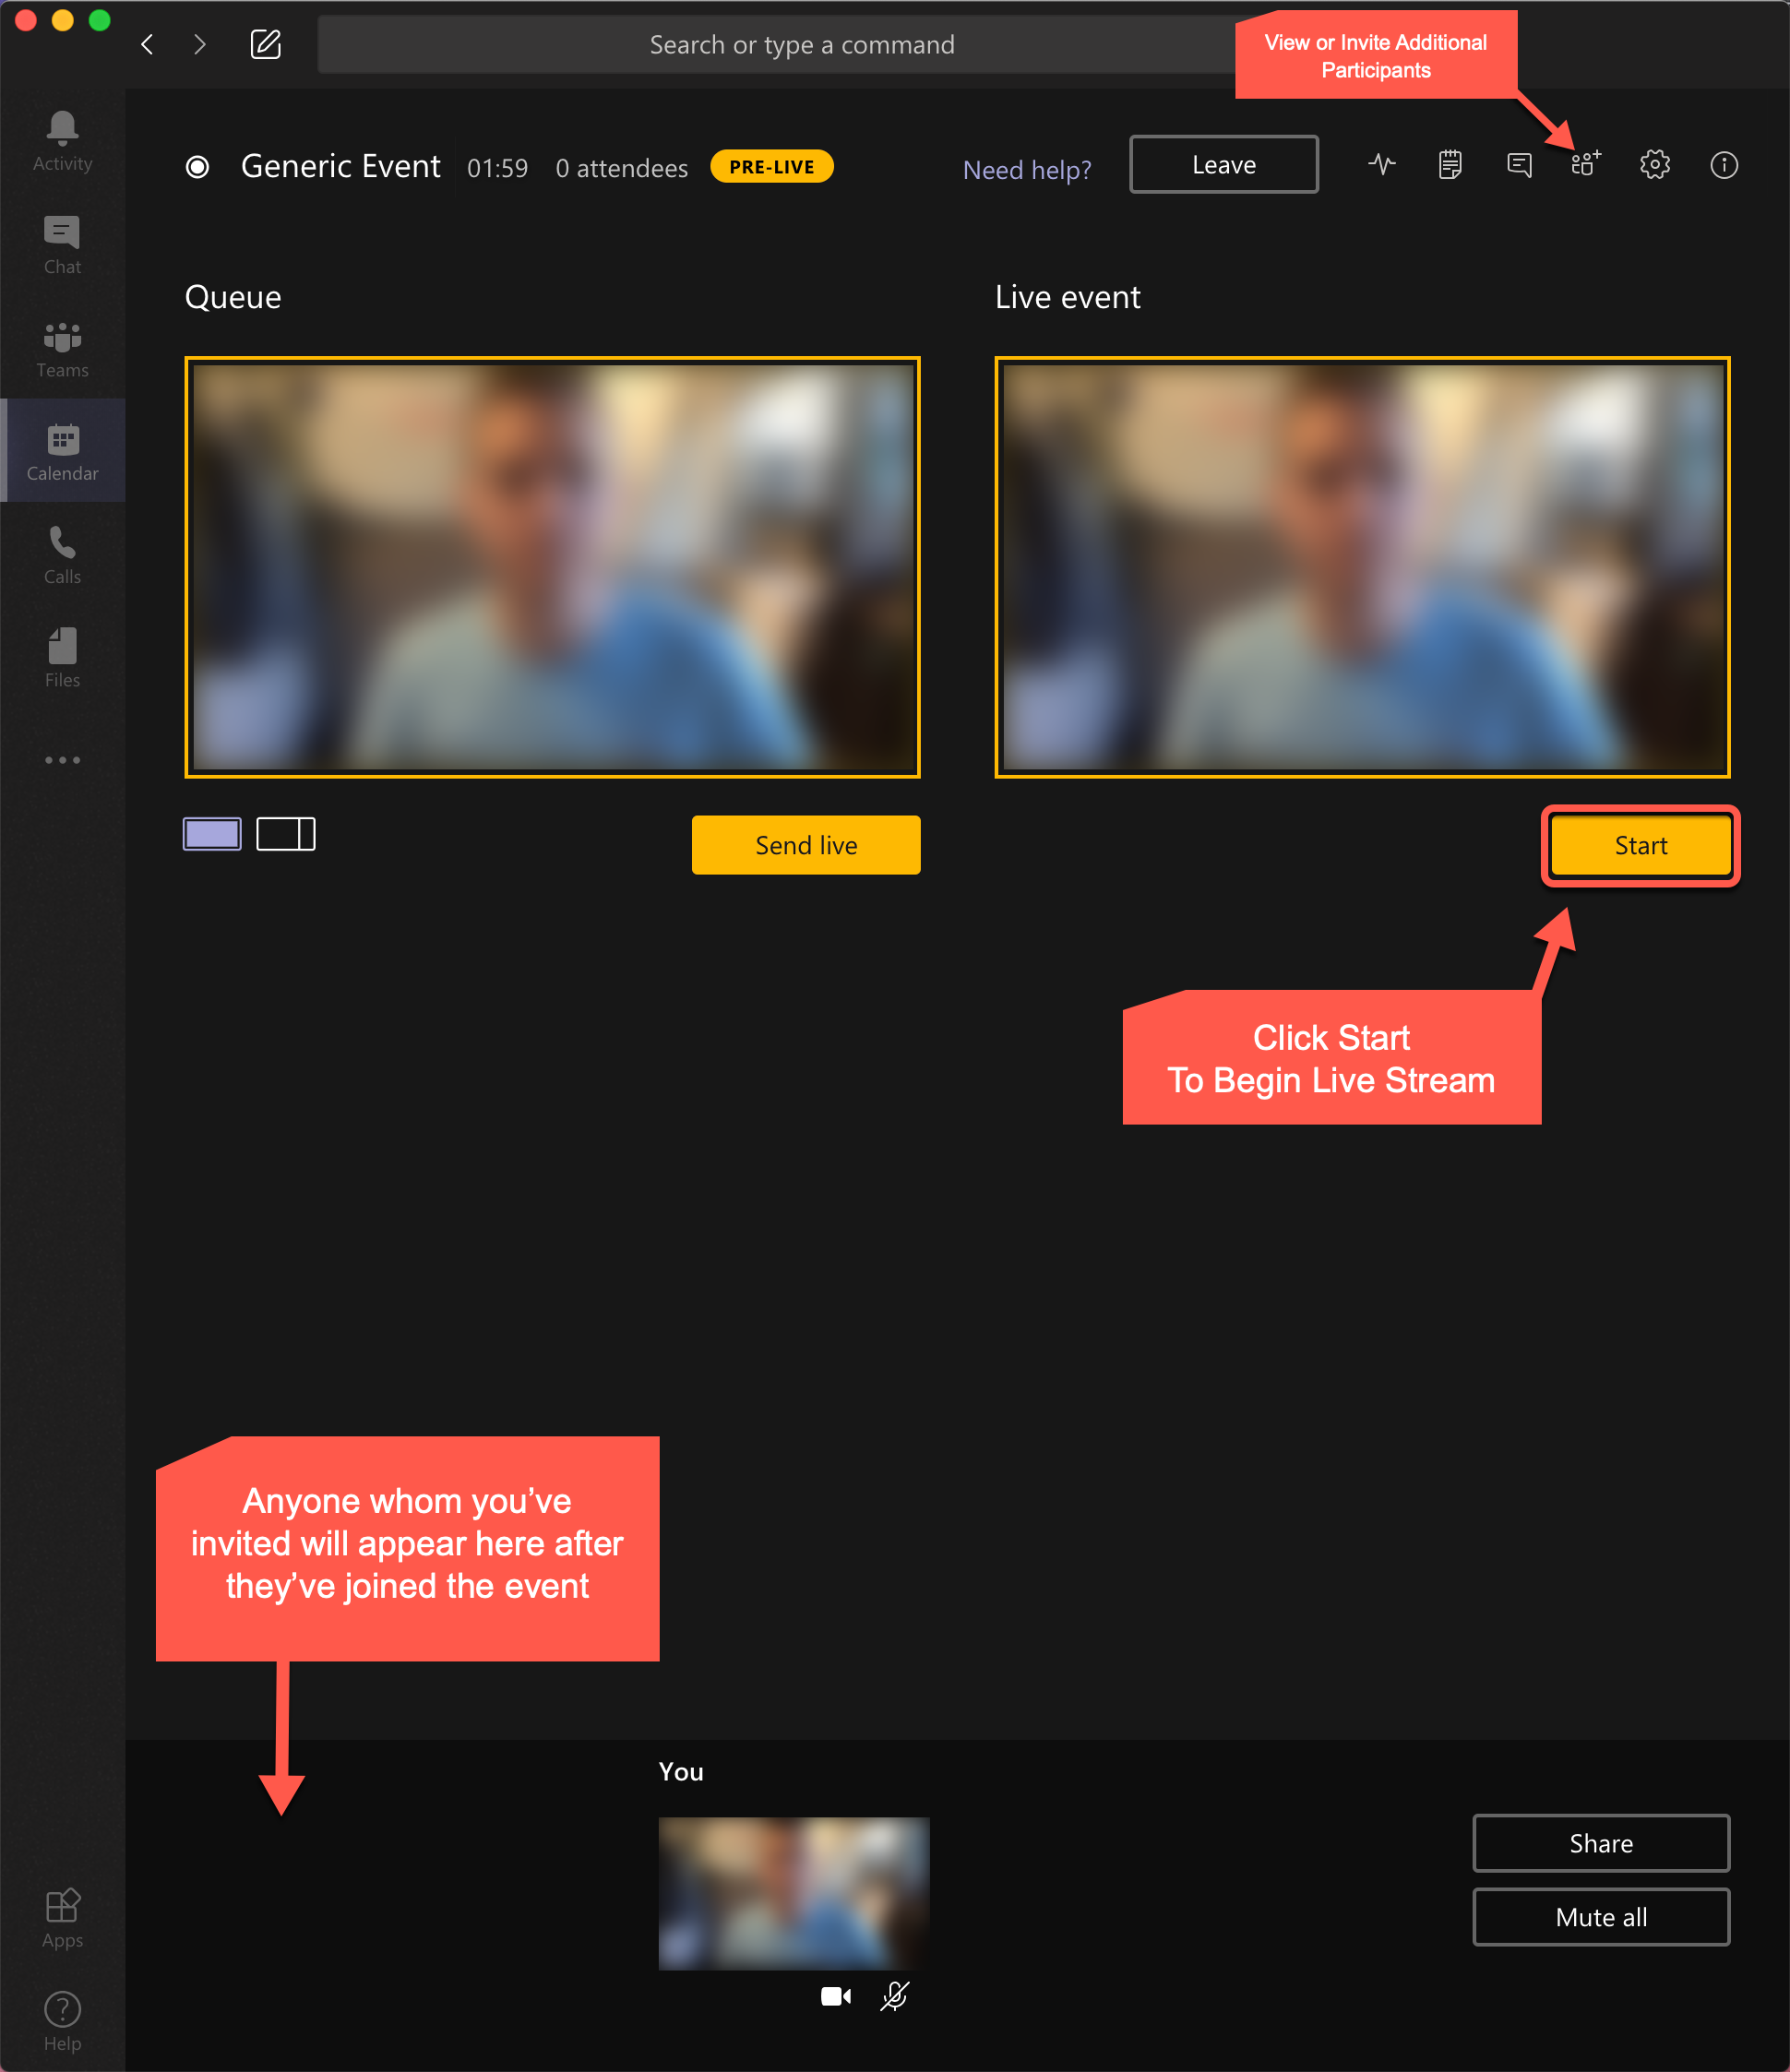
- The event does not begin or go live until you click Start
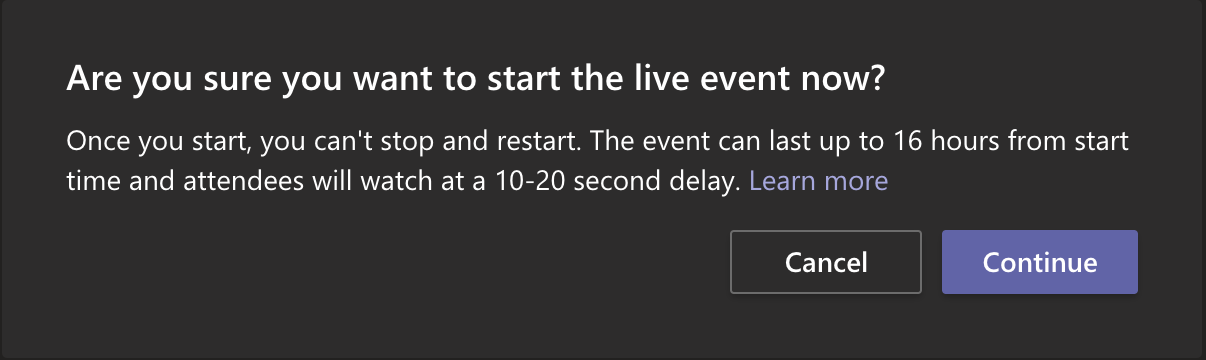
- A delay like this is normal when live streaming over the Internet. Your audience will not be aware of this delay.
- Once the event is live, your audience will be able to view it from the link you sent in Step 5. When you event is over, click End.
- In the center top, click Leave to exit the event.