Calendar
Calendar
Due dates that are set for assignments, discussions, or quizzes are automatically shown in the calendar view for all users enrolled in the course. You can also create events to remind students of exams, presentations, guest speakers, or other occurrences. Create an event by:
Event
- Select the date of the event on the calendar.
From the 'Event' tab, enter the appropriate information for the event and select the calendar on which you want it to appear.
- Create a title for your event.
- Set a date for the event.
- Set Start time and End time.
- Set location.
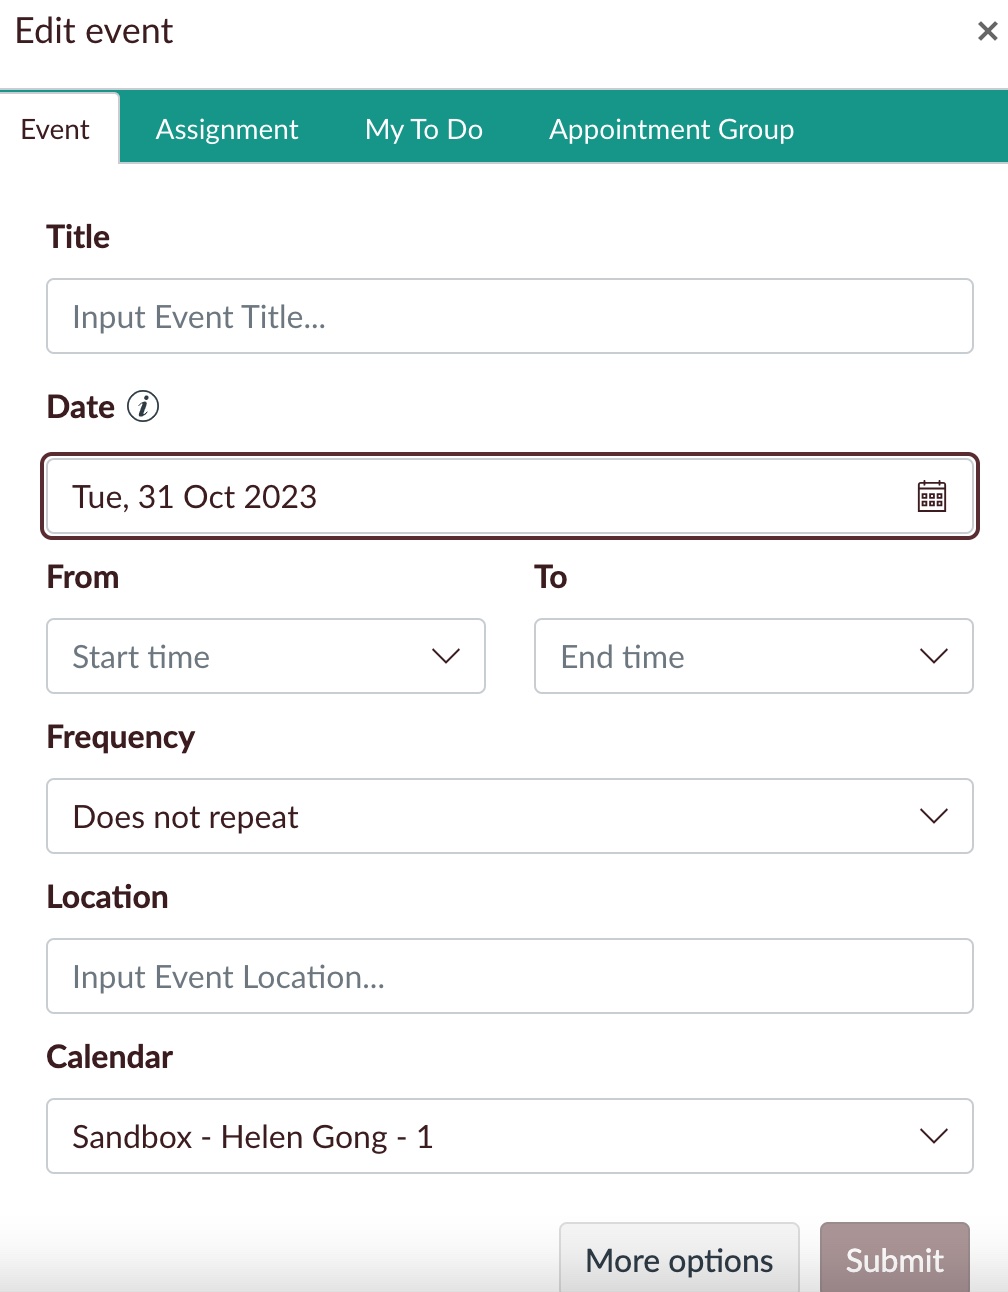
3. Frequency (updated on Oct. 21, 2023)
- When adding or editing an event in a calendar, users can select the frequency using the drop-down menu in the Edit Event modal.
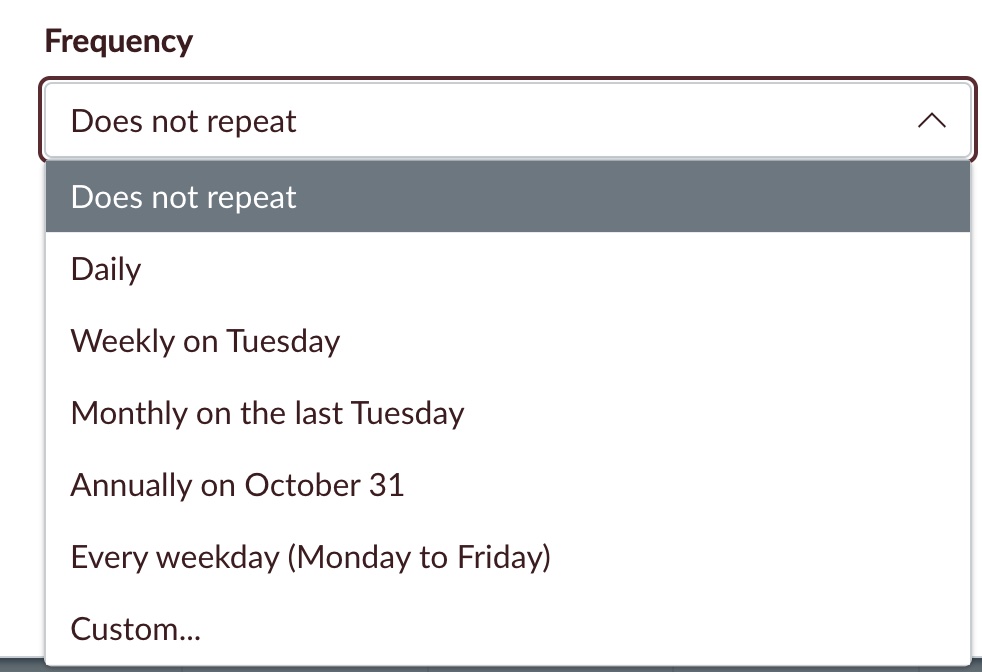
Notes: Each frequency selection has an occurrence default
- daily = 365 (days in a year)
- weekly = 52 (weeks in a year)
- monthly = 12 (Months in a year)
- annually = 5 (The event will occur for five years)
- every weekdays = 52 * 5 (weeks in a year * weekdays)
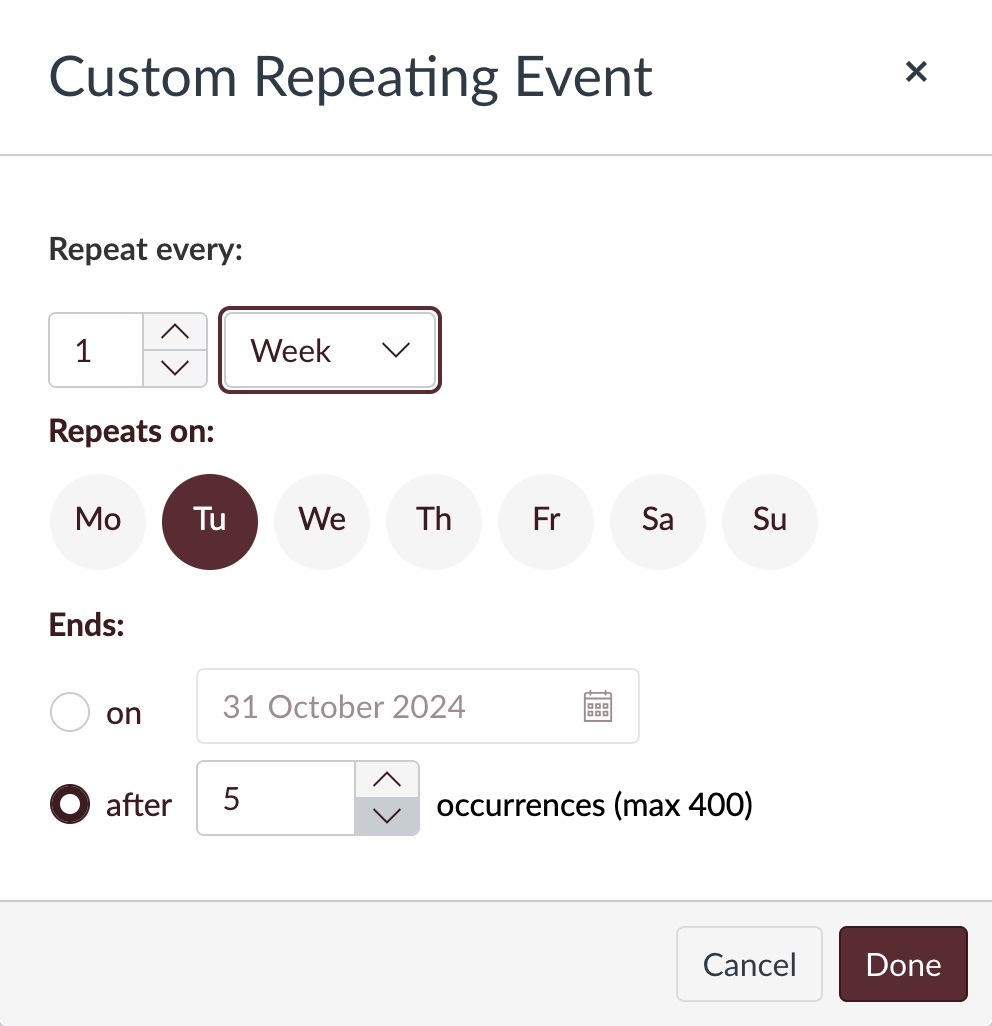
- When the custom option is selected, a modal displays allowing users to customize the frequency of the event.
4. Press 'Submit" when you are done.
Your event will now display on the indicated calendar.
Select 'More Options' to access the Content Editor and add a description, image, video, external links, or other media to the event. You can also edit or update the frequency [1] of the event. Select 'Create Event' to save your work.
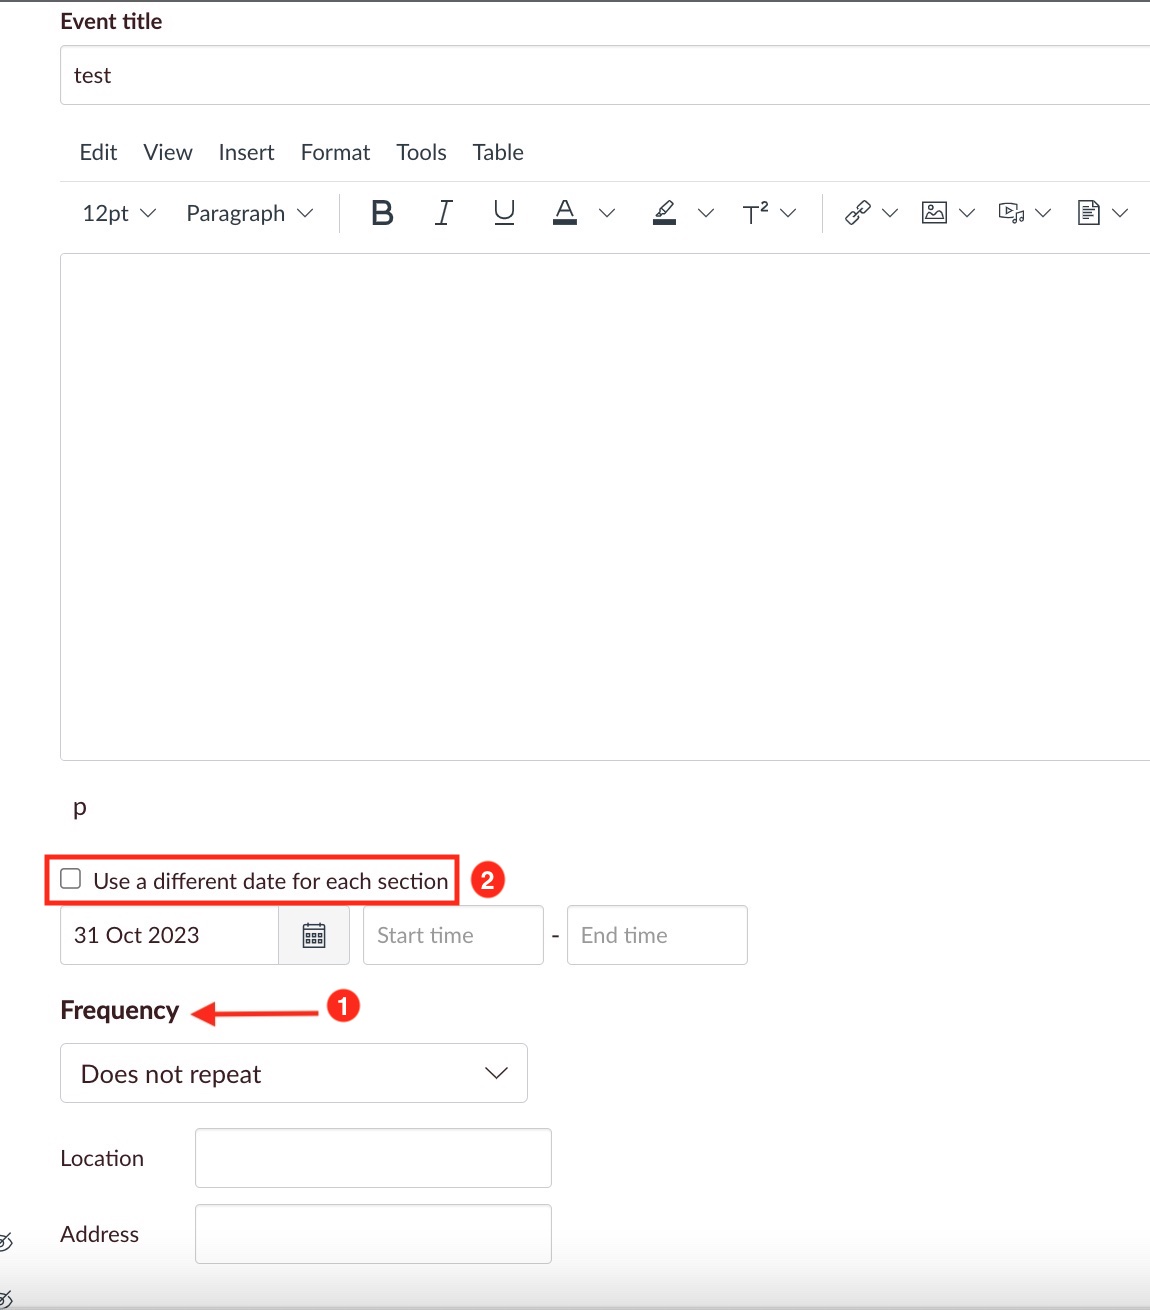
Note: When a user has selected the Use a different date for each section checkbox [2], the frequency option is removed.
5. When deleting a recurring event, a modal displays where users can select which events are deleted.
Assignment, Discussion, Quiz
- Select the date of the event on the calendar.
From the 'Assignment' tab, enter the appropriate information for your assignment. You can choose to only fill this information out now and finish filling out the assignment details at another time, or select 'More Options' to view the full assignment settings page.

- Hit 'Submit' to save your changes. Your assignment will now display as a calendar event and exist in your course.
Scheduler
The scheduler tool lets you set up time slots that students (or student groups) can sign up for. This can be used to advertise office hours, to allow advisees to sign up for advising appointments, or in other scenarios. Set up time slots with the scheduler by:
- Select 'Create an appointment group' in the sidebar.

- Enter the appropriate information into the fields in the pop-up window. There is no need to enter appointment slots individually, simply enter the time ranges in which users can sign-up for appointments and enter a time value in the 'Divide into equal slots of __ minutes." option.

- Select 'Save and Publish'.
- If necessary, from the Scheduler tab, click the settings icon to make any changes.